


Adjustable Fantasy Body Parts v1.0 - Blender 4.3+
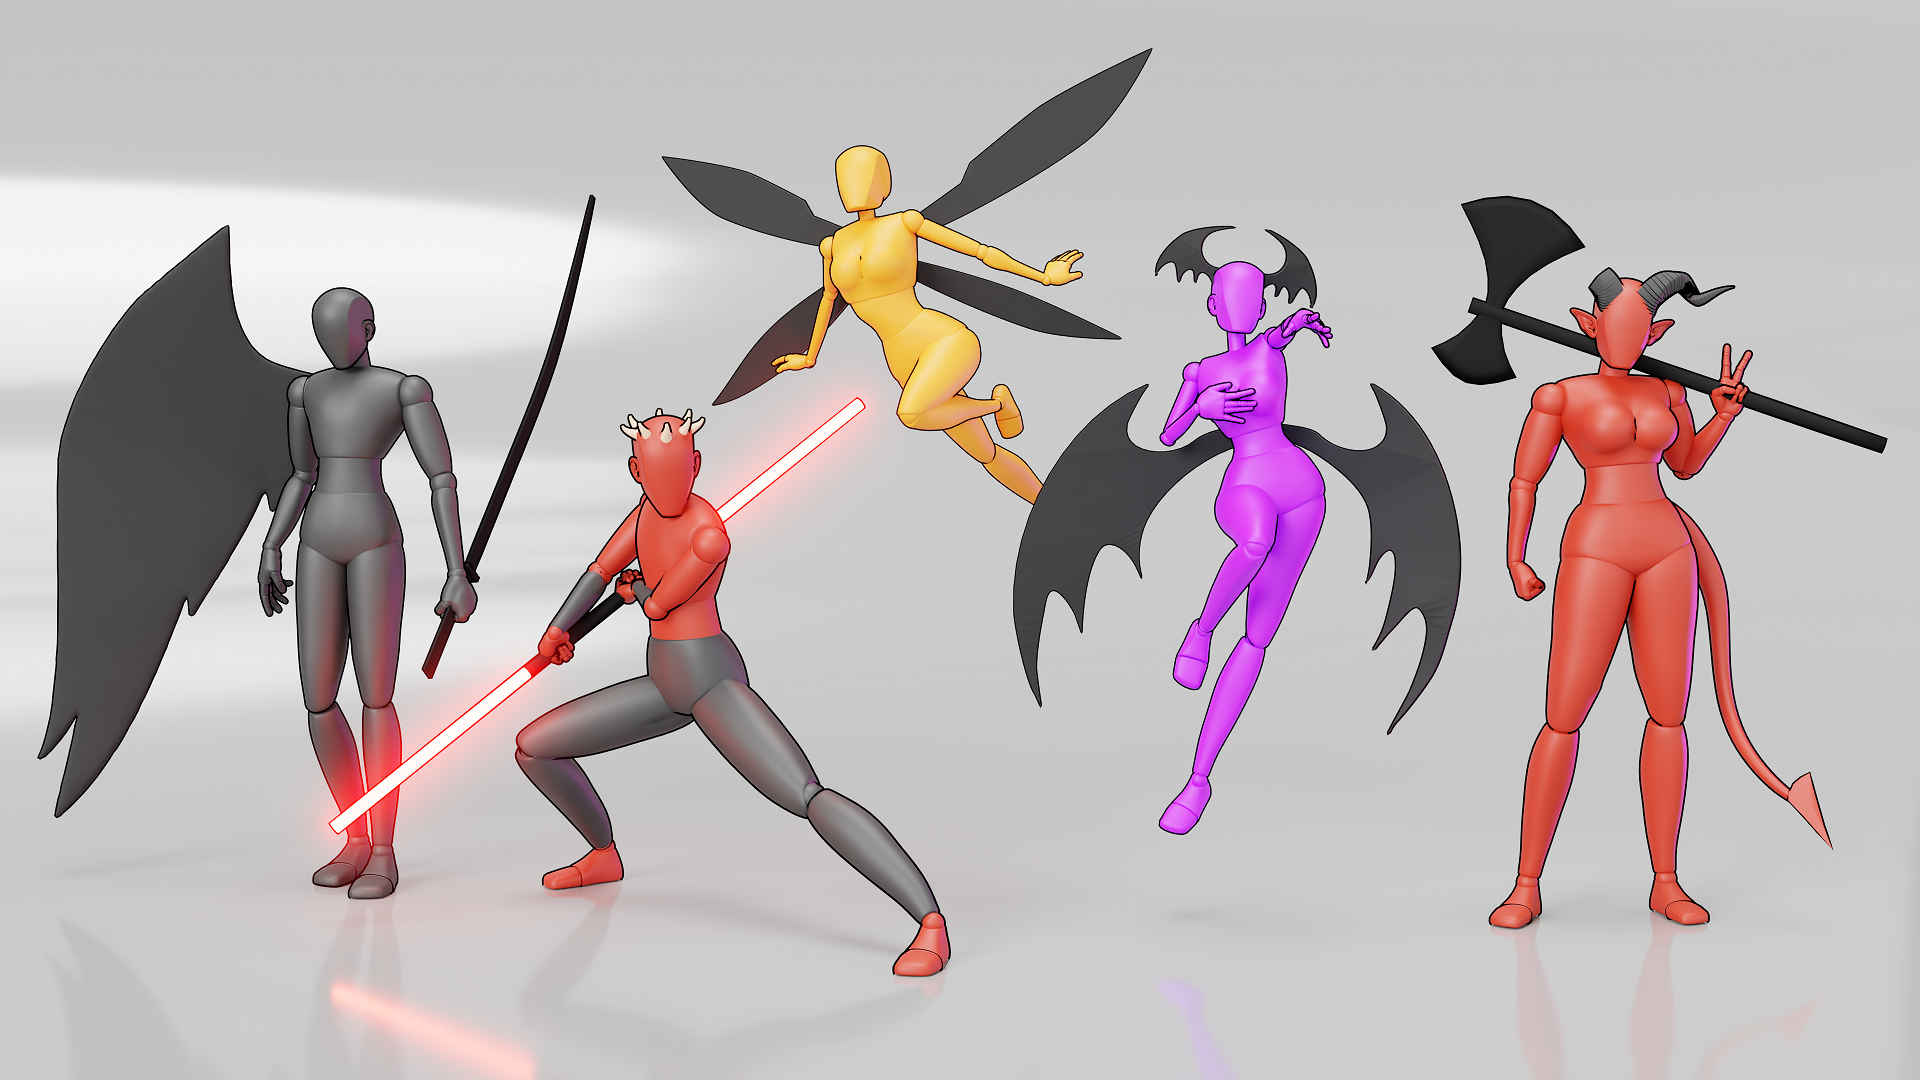
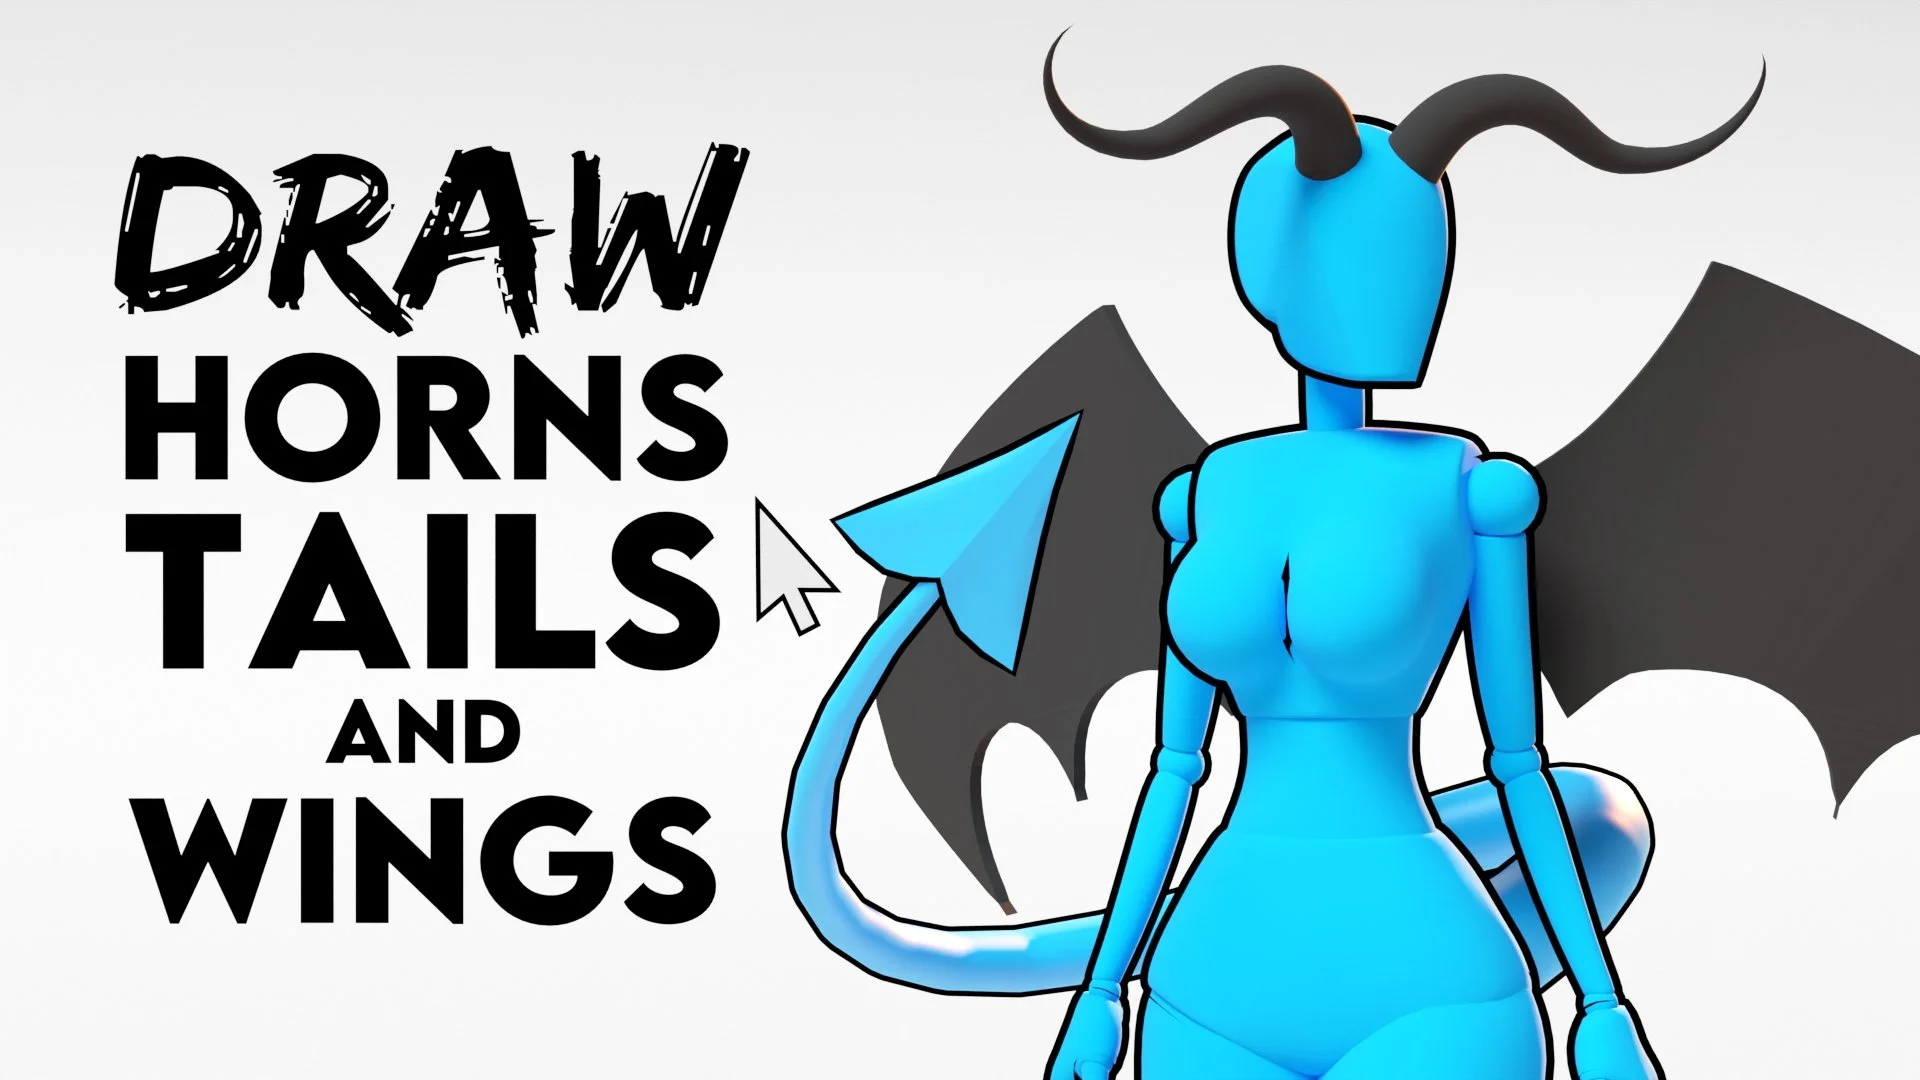
Adjustable Fantasy Body Parts allow you to easily create Customisable Wings, Horns, Ears and Tails and attach them to any character you want.
The Fantasy Body Parts come included with the Adjustable Mannequin v1.3 but it is available as it’s own product if you don’t want the Adjustable Mannequin.
The Fantasy Body Parts are compatible with all Blender 4+ versions, opening them up in some of the Blender 3 versions may cause some errors or crashes
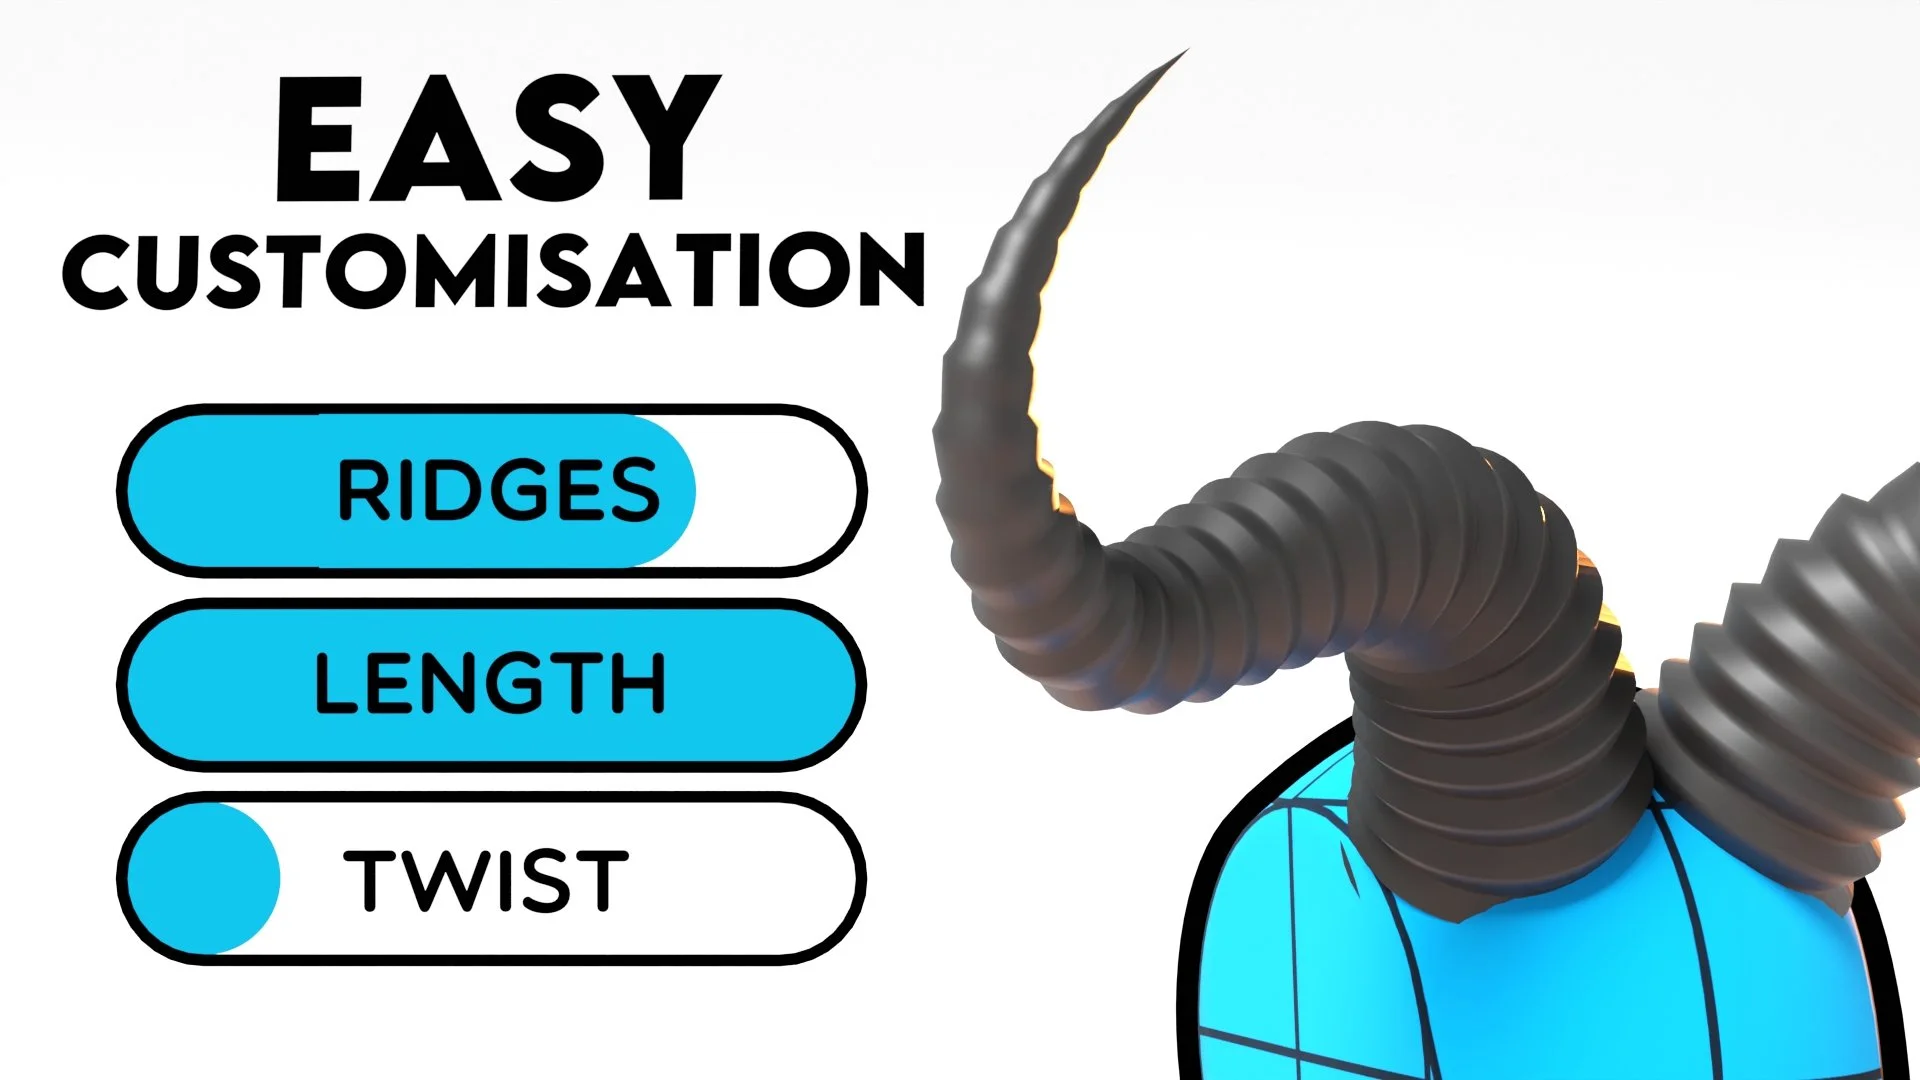
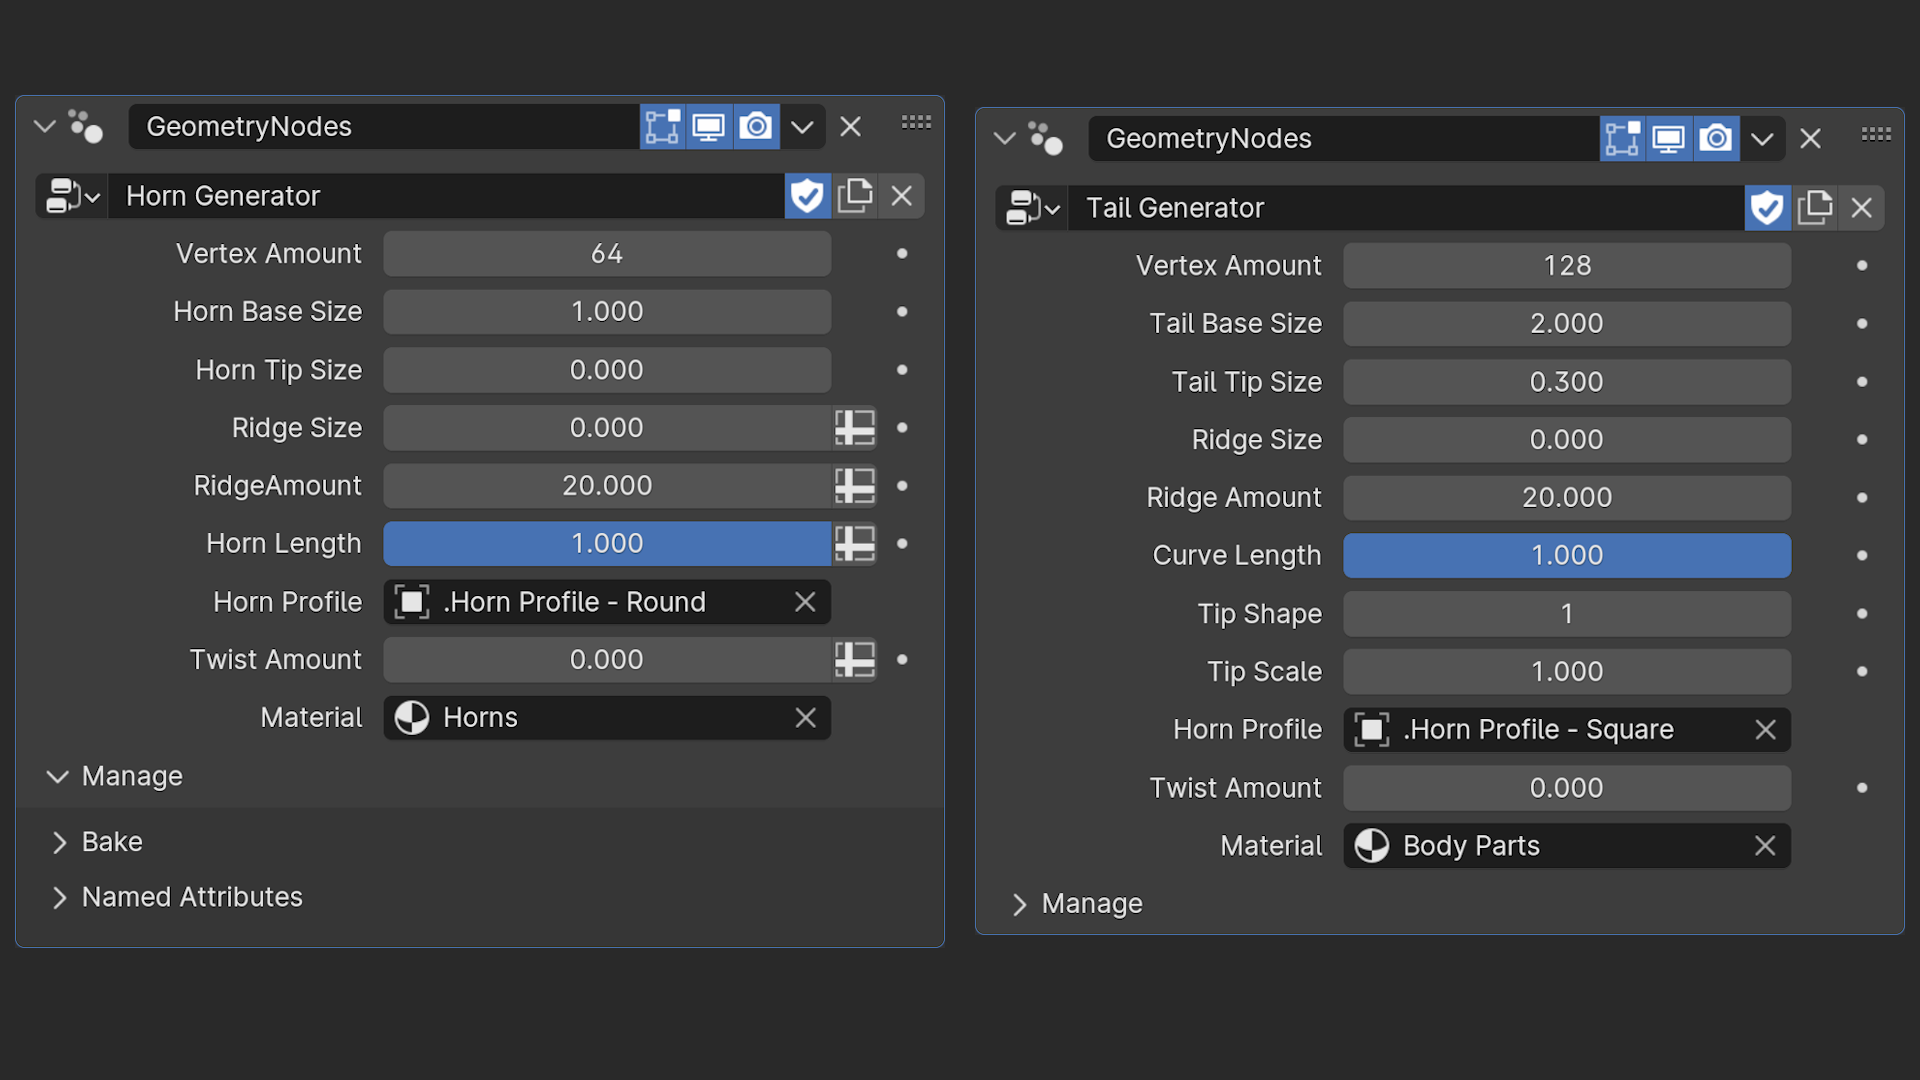
Horns/Tails
The Horns and Tails are both Geometry nodes systems and all you have to do is draw the shape you want and the curve and mesh will be generated for you.
You can manipulate the curve points to modify the shape or change some of the Geometry Nodes settings to create different horn or tail styles.
Wings
The wings are another Geometry Nodes system but a bit simpler.
Again, all you do is draw the shape of your wings and it will create a solid mesh for you, and from here you can start sculpting to add more details to flesh out the shape.
Customisable Ears
Lastly, the Customisable Ear is a fully modelled Ear with a Rig that allows you to push and pull the different points to create different ear shapes.
I’ve also included a few ear presets to choose from, again just select the ear preset you want and it will be applied to the mesh.
Easily Import Into Your Scenes With Assets
If you set up your preferences correctly, you’ll have access to the Asset Browser and this makes importing the Fantasy Body Parts very easy.
All we have to do is open the Asset Browser and go the Adjustable Mannequin folder and select Assets. In here you’ll see all of the Body Parts, now all you have to do is drag and drop them into your scene.
When you drag and drop it will place it in the scene wherever the mouse cursor was, so you’ll need to press Alt+G to get it back to the center.
Some of the assets, such as the Tail, will automatically import all of the other necessary objects that it needs (the tail tip shapes).
You can simply hide these from the outliner by clicking the checkbox beside them.
Adjustable Fantasy Body Parts allow you to easily create Customisable Wings, Horns, Ears and Tails and attach them to any character you want.
The Fantasy Body Parts come included with the Adjustable Mannequin v1.3 but it is available as it’s own product if you don’t want the Adjustable Mannequin.
The Fantasy Body Parts are compatible with all Blender 4+ versions, opening them up in some of the Blender 3 versions may cause some errors or crashes
Horns/Tails
The Horns and Tails are both Geometry nodes systems and all you have to do is draw the shape you want and the curve and mesh will be generated for you.
You can manipulate the curve points to modify the shape or change some of the Geometry Nodes settings to create different horn or tail styles.
Wings
The wings are another Geometry Nodes system but a bit simpler.
Again, all you do is draw the shape of your wings and it will create a solid mesh for you, and from here you can start sculpting to add more details to flesh out the shape.
Customisable Ears
Lastly, the Customisable Ear is a fully modelled Ear with a Rig that allows you to push and pull the different points to create different ear shapes.
I’ve also included a few ear presets to choose from, again just select the ear preset you want and it will be applied to the mesh.
Easily Import Into Your Scenes With Assets
If you set up your preferences correctly, you’ll have access to the Asset Browser and this makes importing the Fantasy Body Parts very easy.
All we have to do is open the Asset Browser and go the Adjustable Mannequin folder and select Assets. In here you’ll see all of the Body Parts, now all you have to do is drag and drop them into your scene.
When you drag and drop it will place it in the scene wherever the mouse cursor was, so you’ll need to press Alt+G to get it back to the center.
Some of the assets, such as the Tail, will automatically import all of the other necessary objects that it needs (the tail tip shapes).
You can simply hide these from the outliner by clicking the checkbox beside them.