
Adjustable Fantasy Body Parts v1.0
Documentation
Adjustable Fantasy Body Parts allow you to easily create Customisable Wings, Horns, Ears and Tails and attach them to any character you want.
The Fantasy Body Parts come included with the Adjustable Mannequin v1.3 but it is available as it’s own product if you don’t want the Adjustable Mannequin.

Overview of features
Below you’ll find a quick overview of all of the features, just covering the basics of how the different Geometry Nodes systems works.
If you want to navigate to a more detailed explanation for the different sections, click the links below and you’ll jump to that point on the page.
Horns and Tails
The Horns and Tails are both Geometry nodes systems and all you have to do is draw the shape you want and the curve and mesh will be generated for you.
You can manipulate the curve points to modify the shape or change some of the Geometry Nodes settings to create different horn or tail styles.


Wings
The wings are another Geometry Nodes system but a bit simpler.
Again, all you do is draw the shape of your wings and it will create a solid mesh for you, and from here you can start sculpting to add more details to flesh out the shape.
Remember, this is designed to be a basemesh, it won’t create fully modelled and rigged wings for you, this is just to give you something to start from.

Ears
Lastly, the Customisable Ear is a fully modelled Ear with a Rig that allows you to push and pull the different points to create different ear shapes.
I’ve also included a few ear presets to choose from, again just select the ear preset you want and it will be applied to the mesh.
NOTE: The Adjustable Fantasy Body Parts are available as their own separate product, so if you just want those, you can get them separately, but it’s included as part of the Adjustable Mannequin.
Horns
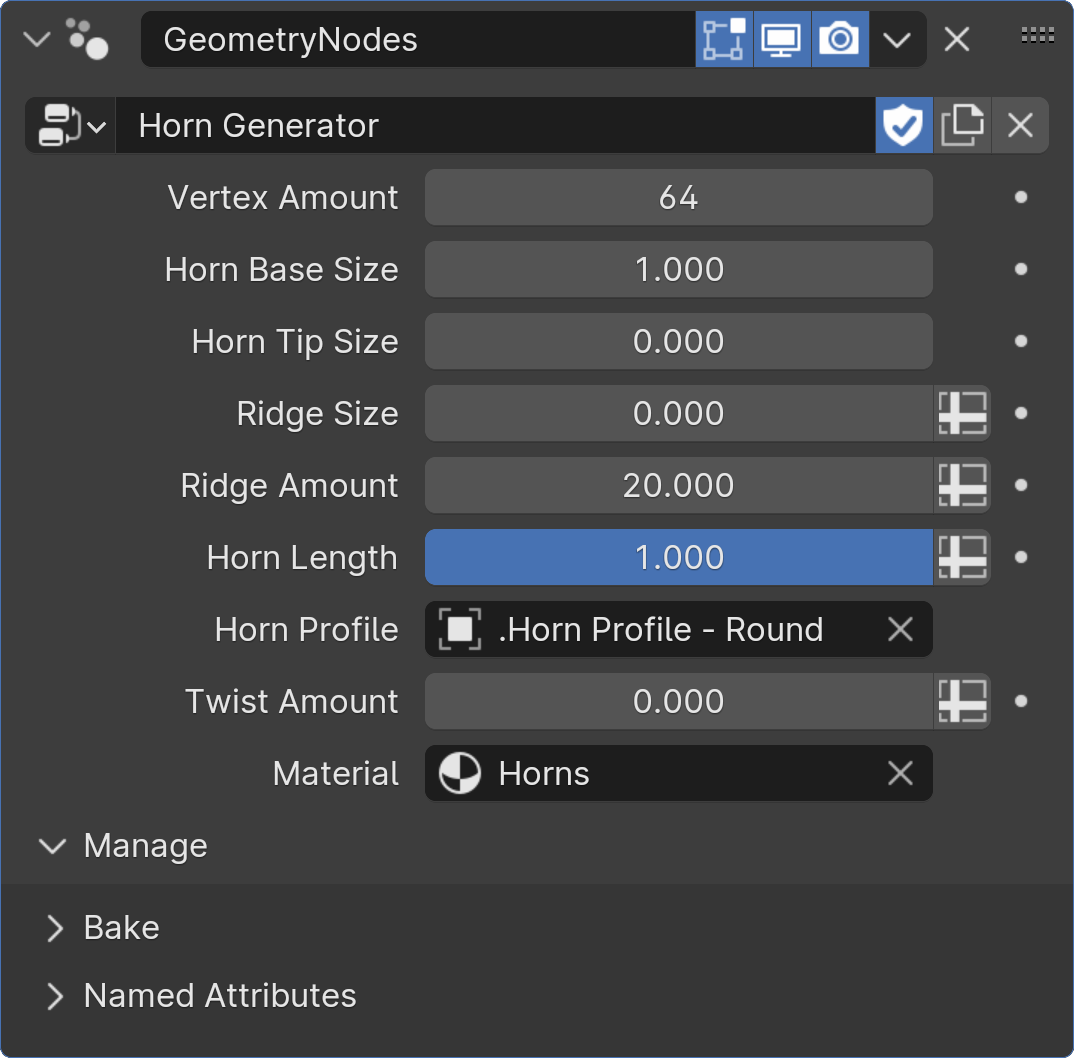
Each of the Geometry Nodes systems have their own settings and parameters that can be changed.
Below you’ll see examples showing you all of the different Geometry Nodes settings for the Horns and how they affect the look of the model.
When you load the file you’ll see an existing set of horns. You can modify these in Edit mode and move, scale or rotate the points, or delete the horn and draw a new one.
Vertex Amount

The Vertex Amount controls the number of loops along the length of the Horn Curve.
If the horn you created is very long, it may need more vertices along its length to make it smooth.
Alternatively you can turn this down for a more Low Poly look.
Turning up the Vertex Amount will also be important for the ridges and twisting as you need more detail to get the full effect of those controls.
Horn Base Size

The Horn Base Size control adjusts the size of the base of the horns.
Use this along with the Horn Tip size to change the size of the horns.
Horn Tip Size
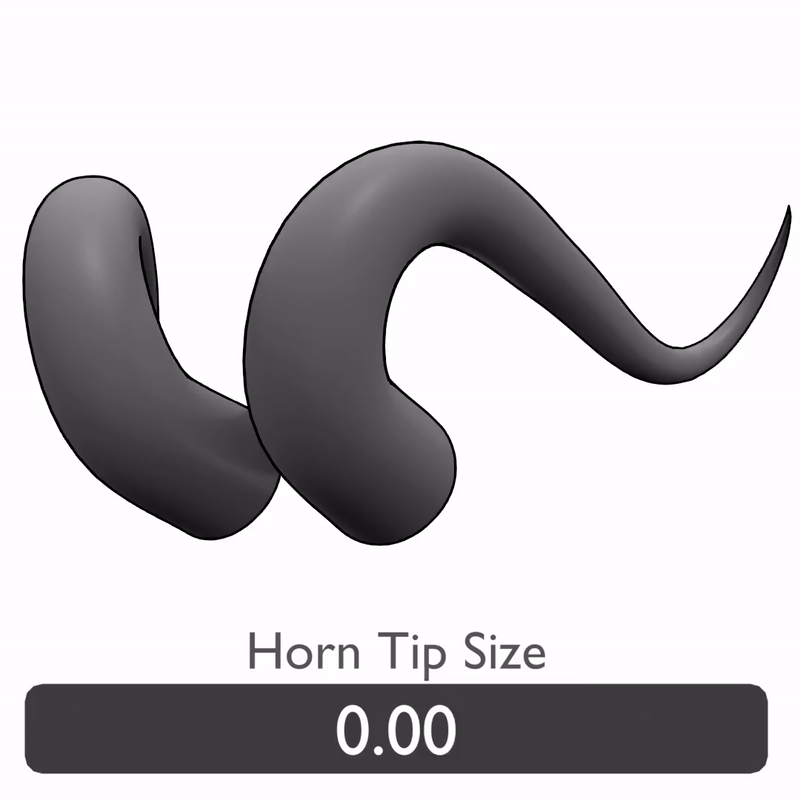
The Horn Tip Size control adjusts the size of the tip of the horns.
Use this along with the Horn Base size to change the size of the horns.
Ridge Size

The Ridge Size control changes the size of the ridges on the horns.
This will be used in combination with the Ridge Amount setting to create ridges along the horn.
Ridge Amount

The Ridge Amount controls how many ridges there are along the length of the horn.
If you don’t see anything, you’ll need to turn up the Ridge size and increase the Vertex Amount to create more ridges.
This is also proportional to the amount of Vertices you have, so if you want more ridges, turn up the Vertex Amount.
It works best when the Vertex Amount is divisible by the Ridge Amount:
Vertex Amount: 256 Ridge 128, 64, 32 etc.
Horn Length

The Horn Length control changes how long the horn is.
This will essentially just cut the horn while maintaining all of the Ridges/Twists etc.
Horn Profile

The Horn Profile setting allows you to choose a Horn Profile.
These Horn Profiles are simple Curve Circles, but you can adjust the shape of them and this will change the overall shape of the horn.
By default there are two horn profiles, Round and Square but you can adjust these or create your own.
The profiles start with .Horn Profile so that they show up at the top of the list.
Modifying Horn/Tail Profile
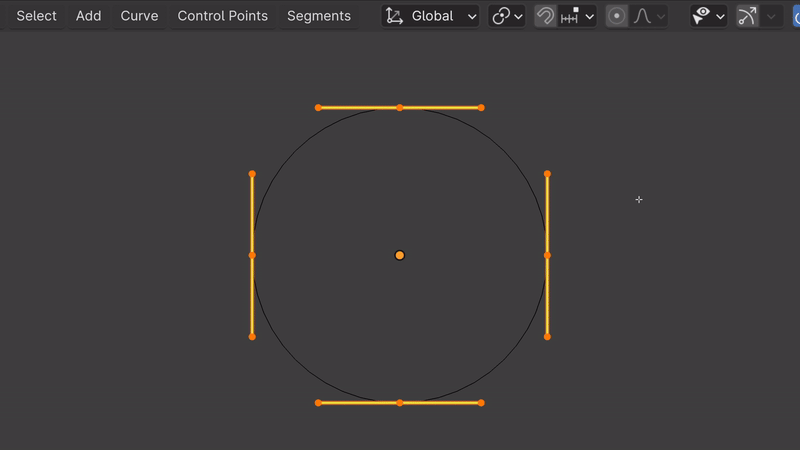
Changing the horn profile allows you to change the overall shape of the horns and you can do this with a Curve Circle.
By default there are two, but if you want to create a custom one, you can create a new Curve Circle and you may need to scale it down so it’s roughly the same size as the two default ones.
To quickly and easily modify the shape of the Curve Circle, you can change the Transform Pivot to Individual Origins, and then scaling all of the points will turn the circle into a square by tightening up the bezier handles.
Twist Amount

The Twist Amount control allows you to twist the horn along its length.
The twisting isn’t very visible with a Round Horn Profile, so change it to square and you’ll be able to see the twisting.
As well the Square profile, you may need to adjust the Vertex Amount if the model looks too sharp.
Material

The Material setting allows you to select a material to apply to the horns.
Geometry Nodes objects don’t use the Materials that are set up on the object, you have to manually assign it.
Tails
The Tails Geometry Nodes system is very similar to the Horns, the only difference is that we can change the shape at the tip of the tail. I’ll cover how we can use the different parameters to change the tail shape.
Again, like the horns, you’'ll see a tail when you open the project. You can enter Edit mode and manipulate the points of the curve, or you can delete them all and draw a new one.

Vertex Amount

The Vertex Amount controls the number of loops along the length of the Tail Curve.
If the tail you created is very long, it may need more vertices along its length to make it smooth.
Alternatively you can turn this down for a more Low Poly look.
Turning up the Vertex Amount will also be important for the ridges and twisting as you need more detail to get the full effect of those controls.
Tail Base Size

The Tail Base Size control adjusts the size of the base of the tail.
Use this along with the Tail Tip size to change the size of the horns.
Some of the Tip Shapes will need a larger tail to work correctly, so use these two controls to make it match
Tail Tip Size

The Tail Tip Size control adjusts the size of the tip of the tail.
Use this along with the Tail Base size to change the size of the horns.
Ridge Size

The Ridge Size control changes the size of the ridges on the tails.
This will be used in combination with the Ridge Amount setting to create ridges along the horn.
Ridge Amount

The Ridge Amount controls how many ridges there are along the length of the tail.
If you don’t see anything, you’ll need to turn up the Ridge size and increase the Vertex Amount to create more ridges.
This is also proportional to the amount of Vertices you have, so if you want more ridges, turn up the Vertex Amount.
It works best when the Vertex Amount is divisible by the Ridge Amount:
Vertex Amount: 256 Ridge 128, 64, 32 etc.
Tail Length

The Horn Length control changes how long the horn is.
This will essentially just cut the horn while maintaining all of the Ridges/Twists etc.
Tail Profile

The Tail Profile setting allows you to choose a Tail Profile.
These Tail Profiles are simple Curve Circles, but you can adjust the shape of them and this will change the overall shape of the tail.
By default there are two tail profiles, Round and Square but you can adjust these or create your own.
The profiles start with .Tail Profile so that they show up at the top of the list.
Tip Shape
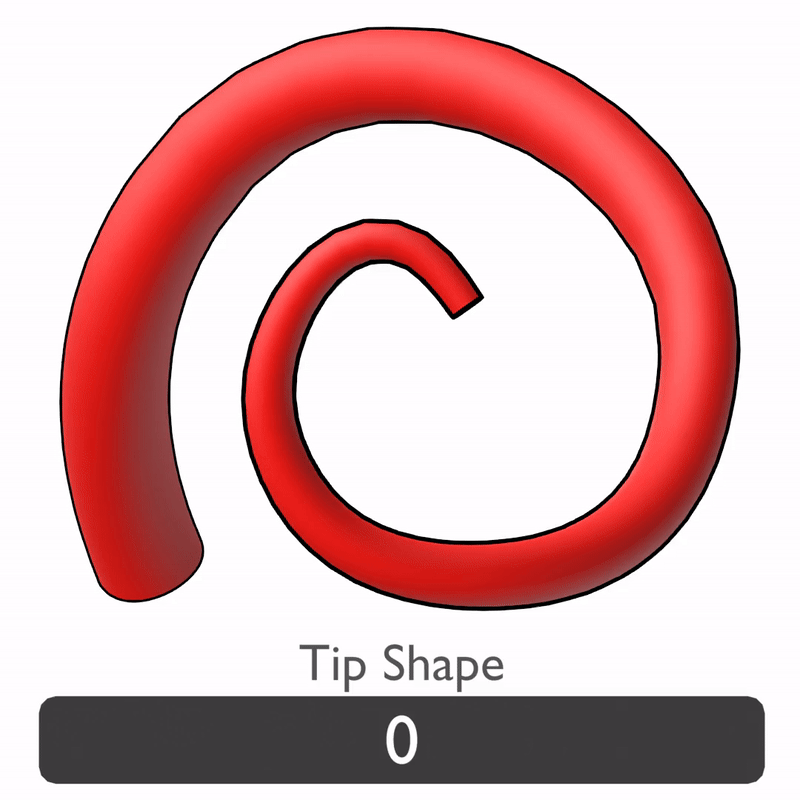
The Tip Shape control allows you to change the shape of the end of the tail.
Setting this to 0 will remove the tip. The rest of the shapes are:
Pointy Tail
Fluffy/Lion
Shark
Mermaid
For some of the tips, like the Shark/Mermaid, you’ll need to change the Tail Size and/or the Tip Size to make them fit correctly.
Twist Amount
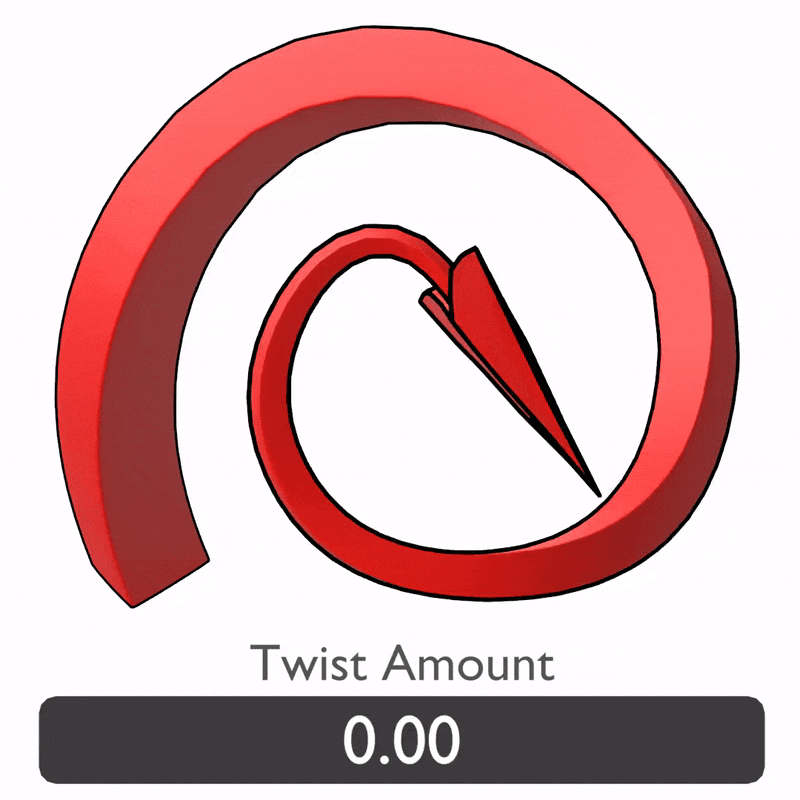
The Twist Amount control allows you to twist the tail along its length.
This is very useful for rotating the tip of the tail. Usually minor adjustments will allow you to rotate the tip of the tail to face the camera for example.
The twisting isn’t very visible with a Round Horn Profile, so change it to square and you’ll be able to see the twisting.
As well the Square profile, you may need to adjust the Vertex Amount if the model looks too sharp.
Tip Scale

Tip Scale allows you change the size of the shape at the end of the tail.
Material

The Material setting allows you to select a material to apply to the tail.
Geometry Nodes objects don’t use the Materials that are set up on the object, you have to manually assign it.
How To Draw Curves
In order to draw the Horns/Tails/Wings you have to use the Draw Spline Tool.
With the horns selected (if you deleted all of the curve points you can select it from the Outliner), enter Edit Mode and on the left-hand side, find the Draw Spline tool, be careful not to select the Annotate Tool as they look very similar.

Now with the Draw Spline tool, simply draw your shape.
You can play around with the tool options at the top. If you want it to be drawn on the surface you can enable Surface , or it can be drawn based on the location of the 3D cursor.
Enable Only First and this will make only the very first point of your curve stick to the surface.


If you’re not happy with the shape, you can select any of the points and transform them using Blenders basic tools. (G – Move, R – Rotate, S – Scale)
Enable Proportional Editing (O) and scroll the mouse wheel to increase it’s influence and this will transform connected areas together.
If a point is too sharp you can scale it and it will smooth out the curve.
You can also extrude points of the curve (E). This can be useful for refining a mesh and adding just a little bit extra to the curve.
If you need some more points to add extra bends to your curves, you can select the two surrounding points and Right Click > Subdivide. This will give you another point in between the two we selected and now you can more control over the shape of the curve.
Using the Tail to make a Mermaid

As well as using the Tail to create a traditional tail, we can also get a bit creative with it and make a Mermaid Tail.
Let’s start off with a basemesh here and we’re simply going to delete the legs of the model.
Now we can drag and drop our Tail asset into this project and draw our Tail Curving backwards coming from the hips. You’ll have to play with the tail size settings to get it to sit roughly around your character’s waist and it may not be perfect, but we can fix it in a minute.
Now select the mermaid Tail shape (4) and scale and rotate this so it looks right.
When you’re happy with the overall shape, we can right click on the mesh and Convert to Mesh, and this will remove the Geometry Nodes system, and now we can enter Edit mode and fix the transition from tail to body.
If you wanted to take this further, you could merge both parts together and remesh them to start sculpting to create whatever design you’d like.
If you wanted to use this for a game, you would draw the tail facing directly downwards, then you can rig it and curl it up into the correct position for your character.
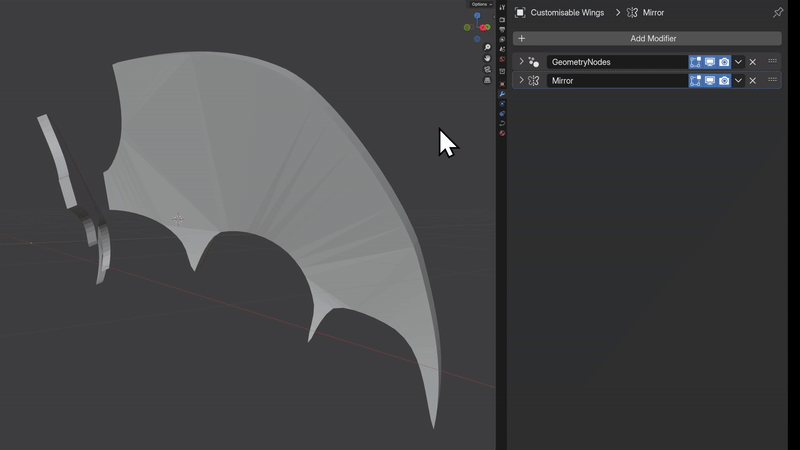
Wings
The Wings are another Geometry Nodes system, albeit a bit simpler than the Horns and Tails, all you have to is draw the shape of the wings as explained above, and the Geometry Nodes will fill in the shape for you and give it some thickness.
The Wings also have a Mirror modifier applied by default, so if your character only has one wing, you can delete the modifier.
IMPORTANT:
The Wings Geometry Nodes system will NOT give you a fully finished rigged wing, this is purely designed for concept art and sculpting as a basemesh. You can make your base shape and then you’ll have to sculpt, retopologise and make your own custom wing rig.
If you want your wing to have a little bit of shape when you draw it, we can create a very basic plane and give it the Subdivision Modifier and create a curved shape.
Now, if we Draw our Curve with the Surface option enabled, we can draw on the curve and the wing will follow the shape of the curve as well as the shape you’ve drawn

The inside of the wings may look jagged and this is just because of how the Geometry Nodes system fills in the shape. If you want to smooth out the mesh a little bit, you can add the Remesh modifier and the Smooth Modifier.
Set the Remesh modifier to a Voxel size of around 0.01 to give enough detail to keep the shape of the wings. Then add the Smooth modifier and set the Factor to 1 and Repeat to around 10 or 20.
This will smooth out the mesh and give you a nicer base to work from.
Make sure to add the Remesh modifier first, or the Smooth modifier will completely smooth out the mesh, making it look strange.
When the basic shape of your wings is finished, you’ll probably want to sculpt them to refine them and add details, and we can do this very easily. Simply Right click on the Wings and Convert to Mesh.
If you added the Remesh modifier you’ll already have some detail so you can go into Sculpt mode and start adding details to your wings.

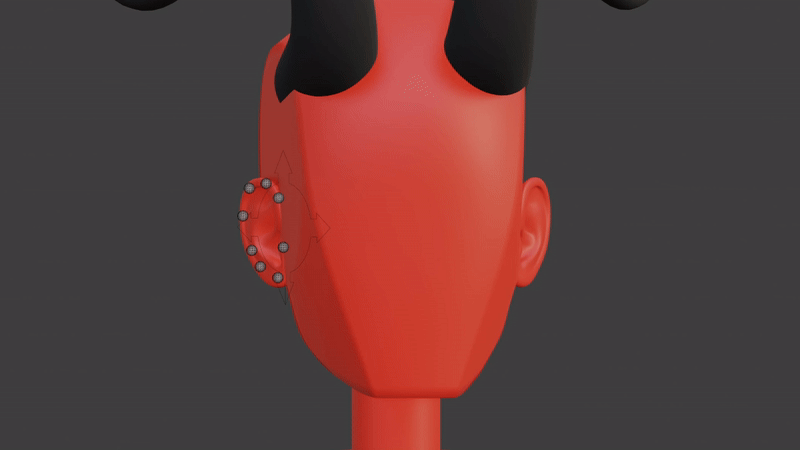
Ears
The Ears are made with a custom rig that allows you to push and pull the ear mesh.
Select the Ear Rig and enter Pose Mode in the top left, now you can select any of the ear bones and start moving, rotating or scaling them to create whatever ear shape you want.
If you set up your Preferences correctly, you can also open up the Asset Browser and navigate to the Adjustable Mannequin folder, in here, you’ll see all of the Ear Presets.
With nothing selected, simply double click one of the ear presets and it’ll apply to the rig.


Setting up Preferences
In order to use the Ear Presets and Assets we need to a little bit of setup so that Blender has everything enabled.
First of all, go to Edit > Preferences and under Add-Ons enable Pose Library. This allows you to make full use of the Asset Browser within Blender. IF this is not enabled, you may be able to see the Asset Library, but it might not actually apply the poses.

Next, in order to access the Presets in ANY Blender file, we can go Edit > File Paths and under the Asset Libraries section, click the + icon. Now locate the folder that contains the Fantasy Body Parts.
If you only bought the Fantasy Body Parts, it will be in a folder on it’s own, so select that folder as the directory.
If you bought the Adjustable Mannequin, select the Adjustable Mannequin folder (this will have 3 Blender files inside it, including the Fantasy Body Parts).
Declaring this folder as an Asset Library tells Blender that any Blender file in this directory can allow it’s shared Assets to be used in ANY Blender project.
The name of the Directory should be automatically generated but you can give this a name if you like.

Using Assets to Import
If you set up your preferences correctly, you’ll now have access to the Asset Browser and this makes importing the Fantasy Body Parts very easy.
All we have to do is open the Asset Browser and go the Adjustable Mannequin folder and select Assets. In here you’ll see all of the Body Parts, now all you have to do is drag and drop them into your scene.
When you drag and drop it will place it in the scene wherever the mouse cursor was, so you’ll need to press Alt+G to get it back to the center.
Some of the assets, such as the Tail, will automatically import all of the other necessary objects that it needs (the tail tip shapes).
You can simply hide these from the outliner by clicking the checkbox beside them.
It will also import the Curve Profile for the Tail and Horns, so you may need to move that so it’s visible, sometimes it can be hidden amongst the other objects.
Be careful not to delete the Horn/Tail Profile Curves, if you do, your horns/tails will have no thickness, and you’ll need to add a new Profile Curve.

Attaching to Your Character
If you want to pose your Fantasy character you’ll need to attach the body parts to your character/rig and we can do this with Object Constraints.
Make sure that your character is in a T Pose and that you haven’t moved the Origin Point of your horns, press Alt+G to reset the location, and if your horns move, then you can head back into Edit mode and fix their location.
Now we can add the Constraint to the horns. With the horns selected, in the Properties tab on the Right, go to the Constraints tab and we want to add the Child Of Constraint.
You can use the Eyedropper to select the Rig. (Make sure to select the Rig, not the Object, as we want to attach the object to the head bone). And then under the new Bone section that appears you can search for the Bone you want to attach to, in this case the head.
The horns shouldn’t move, but if they do, selecting Set Inverse or Clear Inverse might get them closer to the head. Now all we have to do is fine tune the position of the horns in Edit mode until they sit nicely on the head.
Now when you pose your character, the horns should follow the head!
We can do the exact same process with the Ears, Wings and Tails, the only difference is that the Wings will be attached to the Chest bone and the Tail will be attached to the Hip bone. The ears will follow the exact same process as the horns as they will also be attached to the head bone.

Assymetrical Body Parts
By default, the horns and wings have a Mirror modifier applied to them, but in order to create asymmetrical wings you’ll have to duplicate the Geometry Nodes object.
With the horns selected, you can delete the Mirror modifier, then duplicate your horn and press S X -1, this will flip it to the other side of the head. Because you duplicated the horns, these will have separate Geometry Nodes systems that you can play with it individually.

Sculpting
If you want to add more details to the body parts with Sculpting, like scars, battle damage, scales etc, we’ll need to Convert the models to a mesh.
The Horns, Wings and Tails are Geometry Nodes systems, so to sculpt on them we need them to be a mesh. We can do this by right Clicking on them and choosing Convert > Convert to Mesh. Keep in mind this will remove the Geometry Nodes so you will no longer be able to control the curve or the parameters.
Once you’ve done that you can sculpt using whatever method you prefer, you can use Multiresolution, Dynamic Topology or Remeshing.
The Ears are already a Mesh so for those you could use Multiresolution, if you use Dynamic Topology or Remeshing, they won’t work with the Rig correctly.
