
Adjustable Mannequin v1.3 Documentation
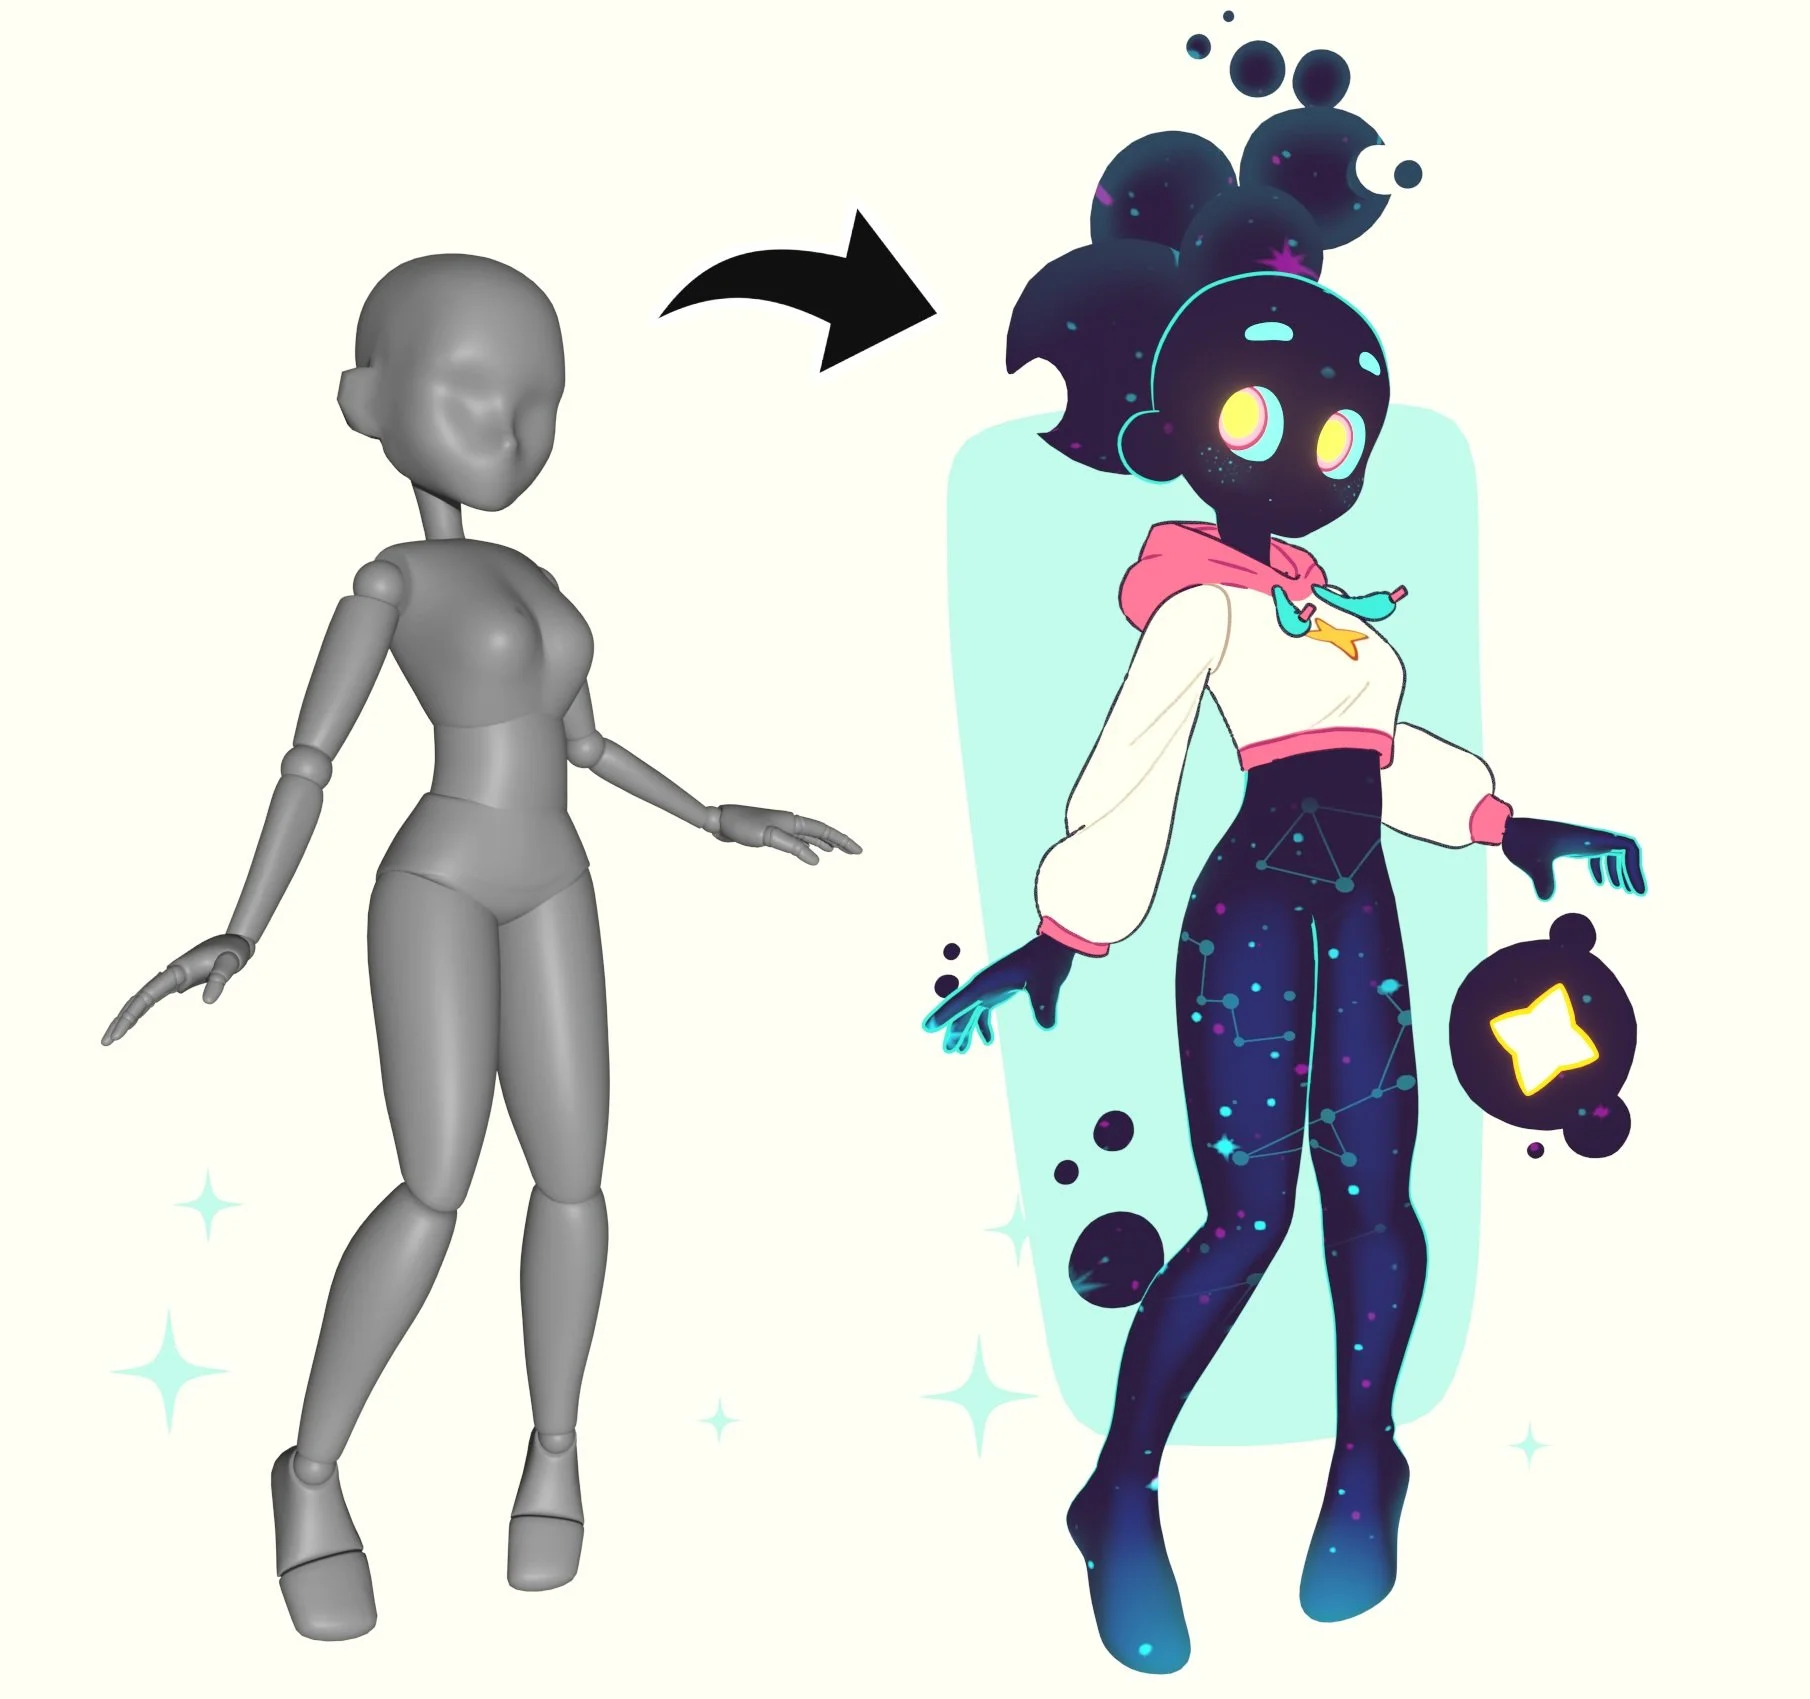
Adjustable Mannequin v1.3 allows you to dynamically control the proportions of a mannequin using sliders and the rig.

You can simply move the sliders and pose your character for pretty nice results, or you can get more advanced and start modifying the rig and mesh directly.
I use this for most of my character models and it’s a quick and easy way to get a nice base mesh to start sculpting.
IMPORTANT
This is for intermediate Blender users, you’ll need to know how to navigate Blender and also know how Blender’s rigging tools work, it’s not going to do everything for you
Also a quick disclaimer, this is NOT AN ADDON.
This is simply a Blender file that contains the customisable models and rigs. So you can just go to File > Open and select the Blender file, it’s as simple as that.
Summary

There is a lot to cover so below you’ll find links that will bring you to each section
New in Version 1.3
New Head Styles
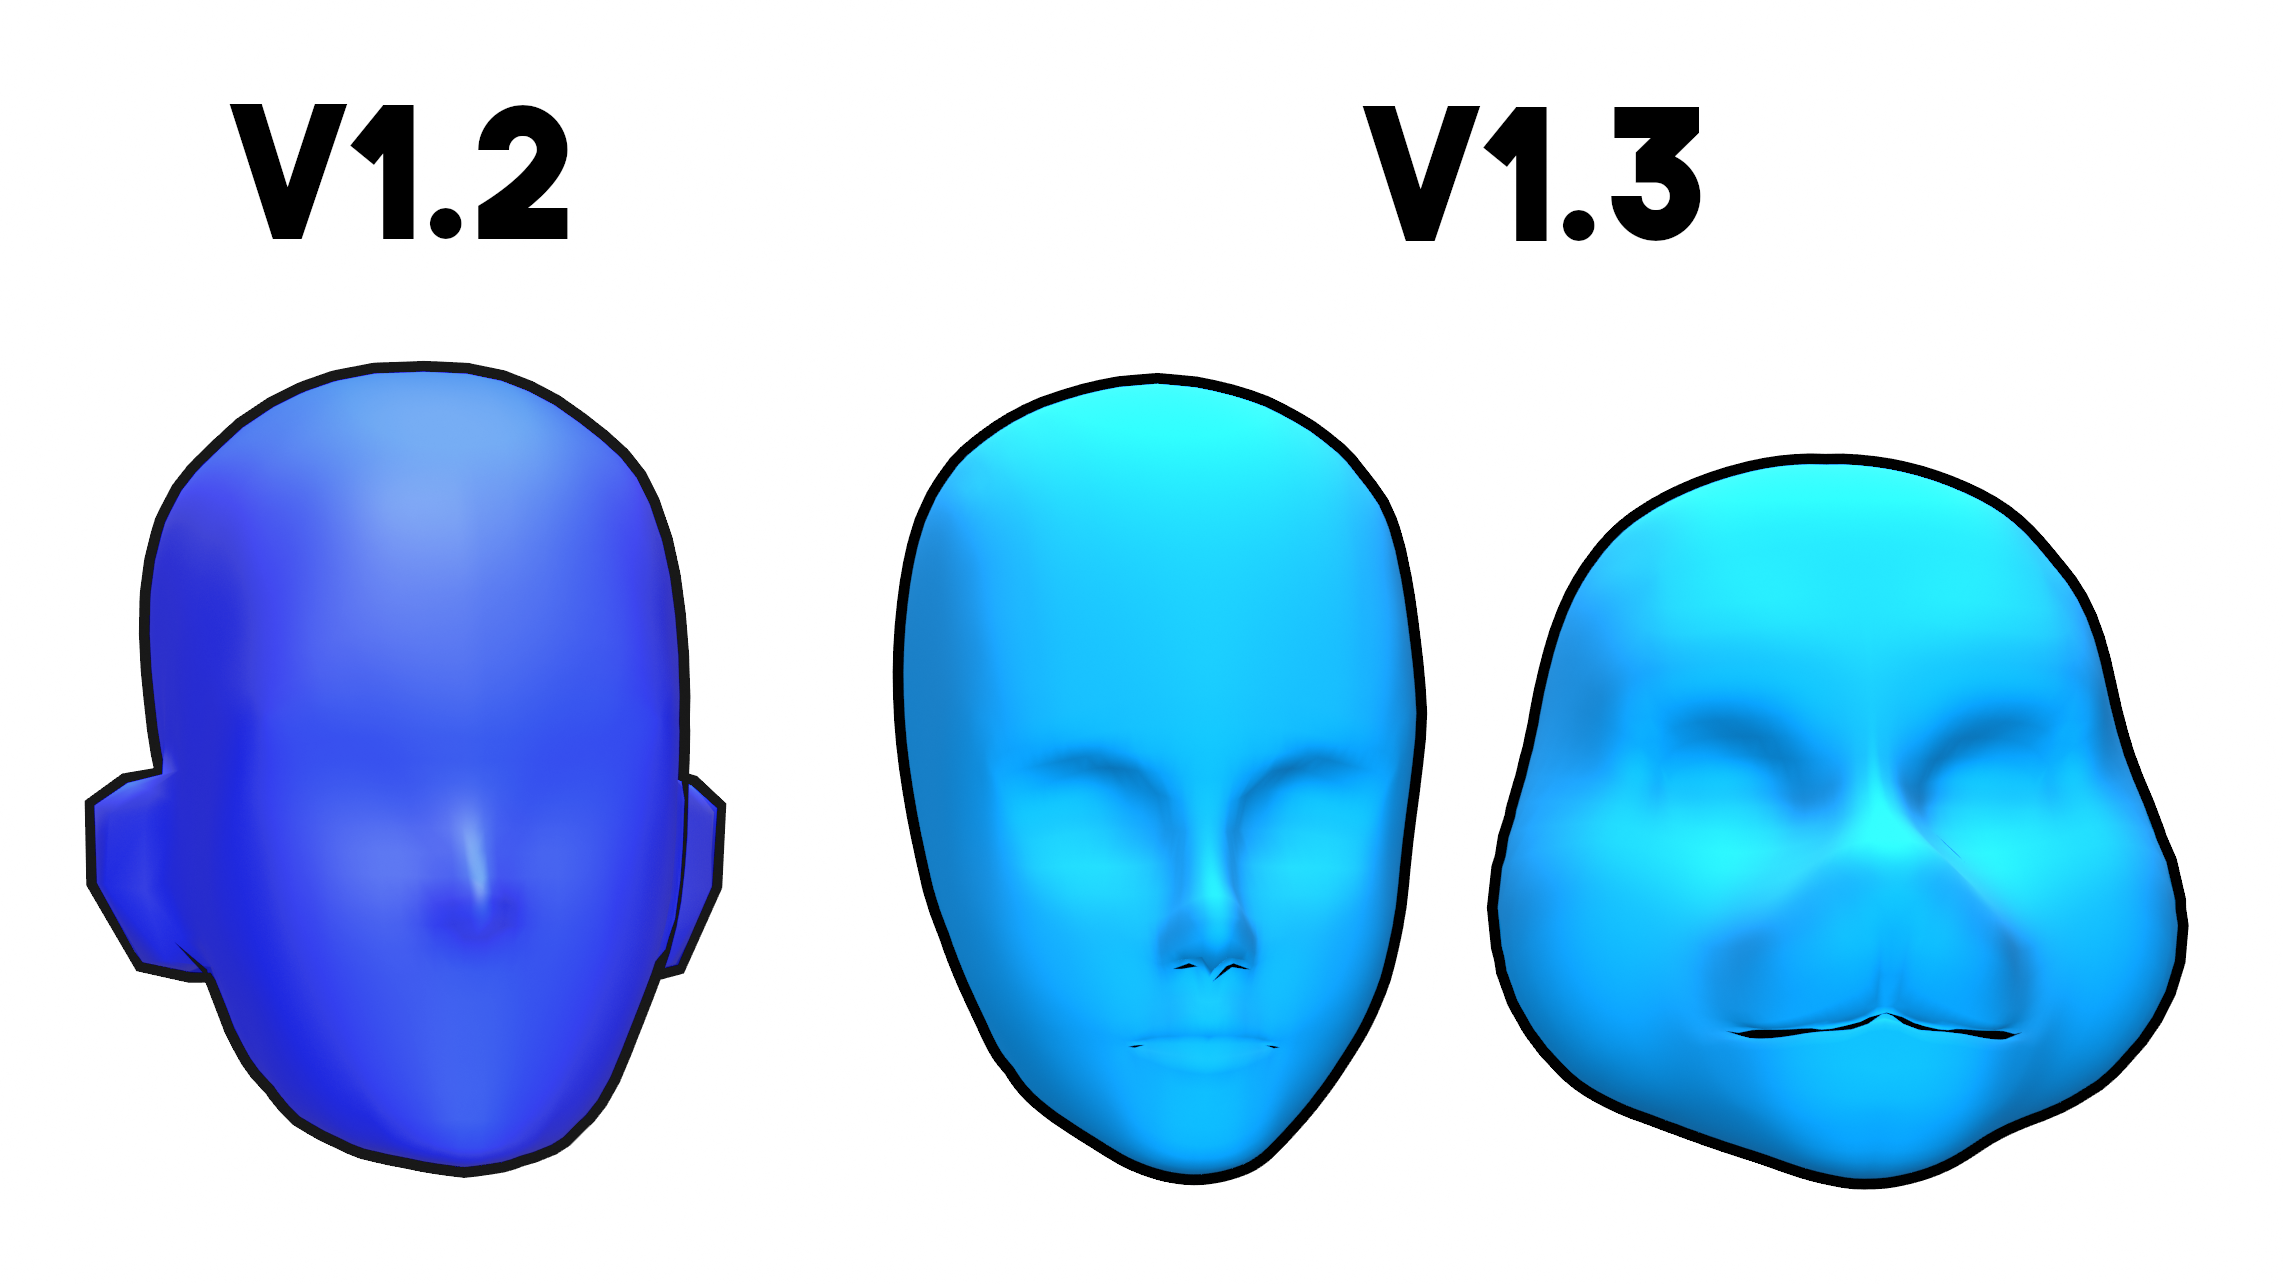
In this version I’ve modified the head shape keys to make a slightly more realistic head as well as added an animal head to allow you to make a bunch of different characters.
60+ New Presets

I’ve also added over 60 new presets to choose from, you simply choose the preset and it applies it to your mesh and you can start sculpting or doing further modelling from here.
Breast Controls
The breasts now have their own dedicated bones, so you can use them to simulate gravity affecting the model
Better Rig

I’ve also made some tweaks to the rig, such as:
added poles to allow you to easily choose the direction of the elbows/knees
the ability to stretch limbs correctly and maintain their size
Rigify Rig

I’ve also added a Rigify version of the rig, so those of you who are more advanced can utilise the Rigify features to pose or even animate the Mannequin, although the pose presets don’t work with Rigify because they’re completely different rigs.
Easy Importing
The Adjustable Mannequin is now set up as an Asset through Blender’s Pose Library, so you can simply drag and drop it into your scene!
Version Compatibility
V1.3 of the Adjustable Mannequin was made for the current version of Blender v4.3, so that’s the version that will be most compatible, but it has been tested with all of these different versions of Blender, so have a look at the list below or the infographic to see what versions of Blender it will work in.

Compatible
Blender 4.3
Blender 4.2
Blender 4.1
Blender 4.0
Blender 3.6LTS (Presets don’t work, but the Rig does)
Incompatible (will crash on startup)
Blender 3.5
Blender 3.4
Blender 3.3LTS
Blender 3.2
Blender 3.1
Blender 3.0
Adjustable Fantasy Body Parts

The big new feature this time around is the Adjustable Fantasy Body Parts, which gives you Customisable Wings, Horns, Ears and Tails.
If you want to see all of the features of the Fantasy Body Parts and how to use them, then click the button below.
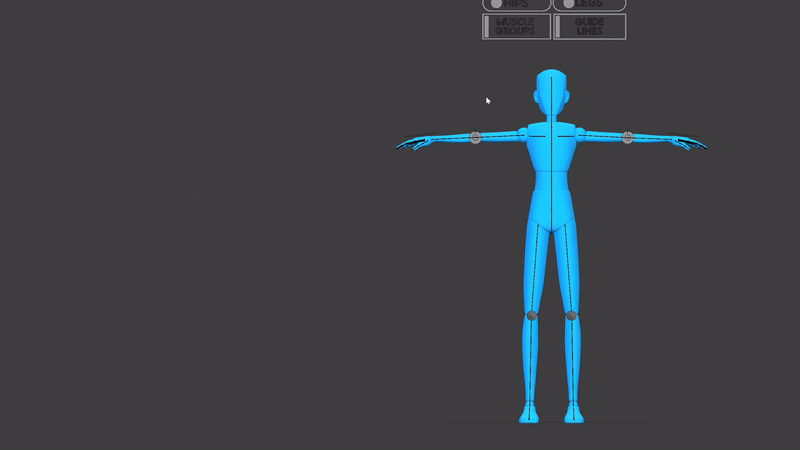
Using the Rig
The rig is set up using IK (Inverse Kinematics). This means we only need to move the ends of the limbs (hands/feet etc) and the arms and legs will bend based on the position of the hands/feet.
The main parts of the body you need to move to pose your character are:
Head
Hands
Feet
Hips
The entire rig is designed to be stretched and manipulated, so you can move, rotate or scale any of the spine bones and they will allow you to create some more varied characters.

The arms and legs are slightly different as you don’t need to manipulate the arm bones in most cases.
To pose the arms, select the hand bone and move/rotate/scale it. You should automatically see the arm bend. If the arm isn’t bending in the right direction, you can move the Arrow pointed towards to the elbow, and this will change the rotation of the arm.
These are Pole Bones, and these are special bones in IK rigs that tell the rig which way it should be pointing, otherwise Blender will just guess and sometimes it can be wrong.
The same logic applies to the Legs, you only need to move the feet, and if it bends incorrectly, move the Poles.

If you’re trying to match a reference image and the joints aren’t lining up correctly, you can scale the arm/leg bones and this will shrink/grow them and change the position of the elbow/knee. This can be very useful for matching reference images and also to create some more appealing shapes for your characters.

The breasts now also have dedicated bones, so you can do further adjustments to the angle and placement of them to simulate how gravity would affect them. You could potentially also use an addon like Wiggle Bones to actually simulate gravity and physics for you.
The breast bones will work with the slider turned all the way down but it may look a little bit weird, so it works best with the breasts slider turned up.
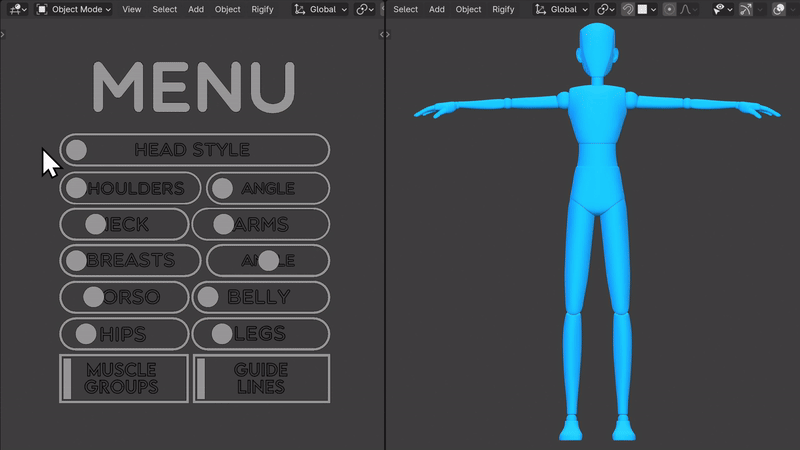
Using the Sliders
The rig uses a custom Menu that controls shape keys which change the body shape of the character.
When you open the Blender file you’ll see this menu floating above the mannequin.

To interact with it, click the menu (it will turn orange) then in the top left corner enter Pose Mode.
The Menu is a Rig, which is a special Blender object that allows us to animate.
Now if you select any of the circles you can press G to move them and drag your mouse left or right.
Below you’ll see examples of how each slider affects the mannequin.

Head Style
The Head Style slider controls the design of the head.
By default, the mesh uses a Loomis head which is a very popular base head shape for artists.
By turning the slider up, the head changes to a more realistic proportioned head, and then to an animal head.
Shoulder Width

The Shoulder Width slider controls how wide the shoulders are.
It actually moves the shoulder bones so you might need to move the hands to fix any IK problems.
Shoulder Angle

The Shoulder Angle slider controls the shape of the shoulders.
This is to emulate the bulky Trapezius muscles that you see on a lot of strong characters.
Using this in combination with the shoulder and neck controls can allow you to create some very strong looking characters.
Neck

The Neck slider controls how wide the neck is.
This is useful for creating more masculine characters in combination with the shoulder controls.
Arms

The Arms slider controls the size of the arms.
Breasts

The Breasts slider controls the size of the breasts.
Breasts Angle

The Breasts Angle slider controls the angle of the breasts.
This will be proportionate to the size of the breasts, if the breasts are smaller, the angle slider won’t have as much effect.
Torso

The Torso slider controls how wide the torso is.
This is useful in combination with the shoulder or belly controls to create bulky characters.
Belly

The Belly sliders controls the size of the belly.
Use this in combination with the torso controls to create heavier characters.
Hips

The Hips slider controls the width of the hips.
This is useful in combination with the Legs control to create more feminine characters.
Legs

The Leg slider controls the size of the legs
Muscle Groups

The Muscle Groups slider allows you to enable a Muscle Group texture so you can easily distinguish different parts of the body, which would be useful for drawing.
Guide Lines

The Guide Lines slider enables a texture with reference lines all over the body showing you center lines for each body part, again, useful for drawing.
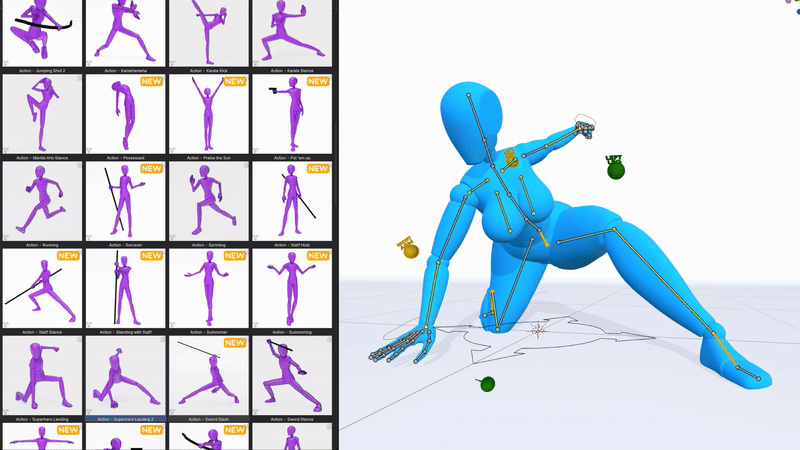
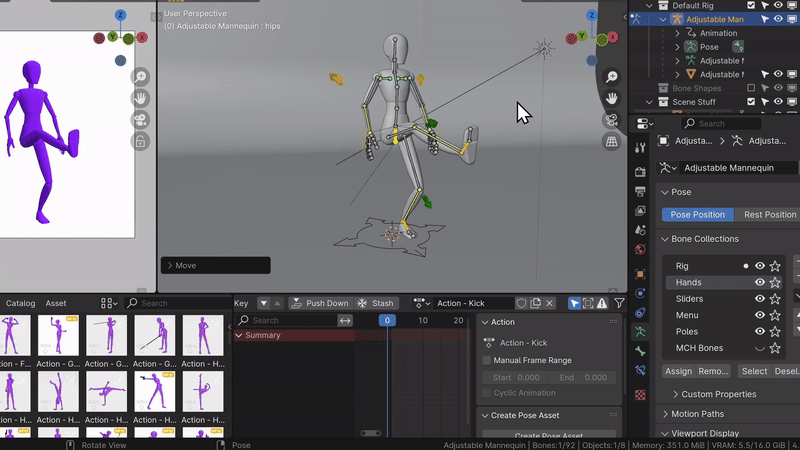
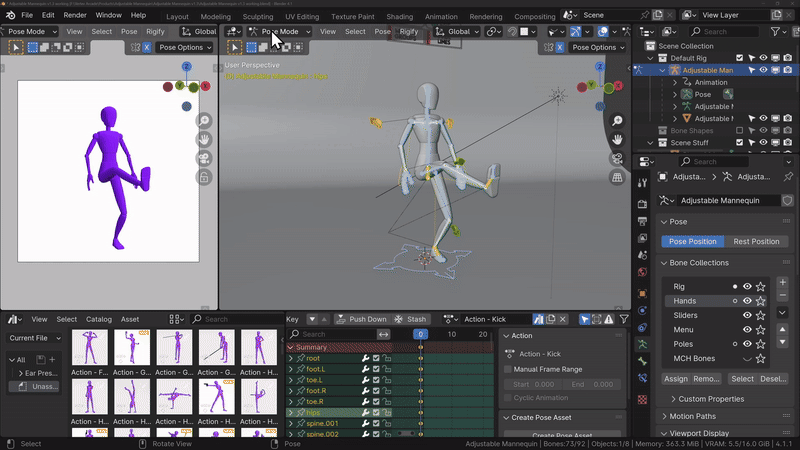
Pose Presets

In v1.3 I’ve added some more Pose Presets using Blender’s Pose Library.
In the Asset Browser you can go to the Catalog AM Poses and you’ll see all of the Pose Presets.
In Pose Mode, with nothing selected you can then double click on any of the Pose Presets and it’ll change the rig and model.
If you want a pose to only affect a certain part of the model, you can select a section of the model, THEN select the pose. The pose will only apply to the selected bones.
There are 5 categories of poses, and these are all colour coded.
Action Poses
Hand Poses
Lying Poses
Sitting Poses
Sitting on Chair Poses
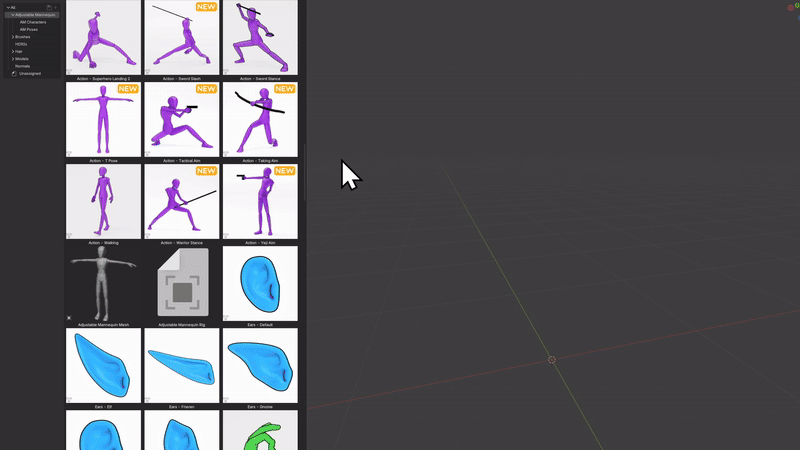
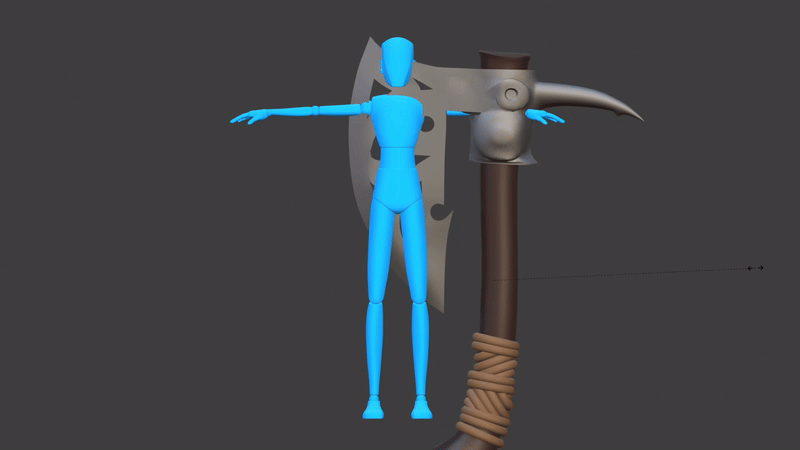
The presets have Tags attached to them so you can easily search for different types of Poses. You can Filter by using the Search bar at the top of the Asset Browser. You can search for any of the Categories of Poses, so Action, Hand, Lying, Sitting, Sitting Chair, and along with there are Weapon poses and these also have the type of weapon that is being used i.e Gun, Sword, Staff, Bow

Preset Objects
As mentioned above, many of the presets are made using weapons or other props, and these can be found in the Preset Objects collection in the Outliner. You can enable the different objects to suit your character’s pose, and by default they all have an Object Constraint so the character will hold them and they’ll follow the movement of the rig.
If you want to move the weapon into a different hand or place on the body, you can follow along with the guide that I’ve written here.

Easy Importing into Other Scenes
The main way to use the mannequin is by creating a new file, or an existing one and importing the mannequin into that scene. There is an easier way, and that’s through the Asset Library. In v1.3 I’ve set up the mannequin as an asset, so simply drag and drop it into your scene (assuming you’ve set up the preferences correctly by following this guide) and the mannequin will be in the scene!
When you drag and drop the Mannequin, you can press Alt+G and this will reset the mannequin’s position. Importing will also bring in all of the Shapes for the Rig, so you can go to the outliner and select all of the bone shapes, and then in the viewport press M and create a new collection. Now all of the Bone Shapes will be inside this collection and in the outliner, you can click the checkbox beside it to hide them.
Now you can use the mannequin as normal, playing with the sliders, rig or using presets!

The manual way of importing the mannequin would be by Appending it into a new scene. This way, all of the presets and poses stay in tact, and any changes that you make are made to a new mannequin, not the original one.
The way to do is is by opening a new scene in Blender or an existing one, then go to File > Append. Locate the Adjustable Mannequin v1.3 Blender file and when you double click it it will open up a list of folders that are contained within the Blender file.
We want to open the Collections folder and Append both the Rig and Bone Shapes collections by Ctrl clicking them. You can Append any of the other collections such as the Fantasy Body Parts or Preset Objects if you want to give your character some fantasy features or use weapons.
When you click Append, the mannequin should appear in your scene. And if you set up your Preferences and Asset Browser correctly, you should be able to pose your mannequin using the presets in the Asset Browser.
You can click the checkbox beside the Bone Shapes to hide them, as these are all of the shapes that make up the rig, so you don’t need to see them, but Blender needs to know where they are.
Asset Browser Setup
In order to use the Presets we need to a little bit of setup so that Blender has everything enabled.
First of all, go to Edit > Preferences and under Add-Ons enable Pose Library. This allows you to make full use of the Asset Browser within Blender. IF this is not enabled, you may be able to see the Asset Library, but it might not actually apply the poses.

Next, in order to access the Presets in ANY Blender file, we can go Edit > File Paths and under the Asset Libraries section, click the + icon. Now locate the folder that contains the Adjustable Mannequin. (This folder should contain 3 Blender files, the Adjustable Mannequin, The Rigify version of Adjustable Mannequin and the Fantasy Body Parts)
Declaring this folder as an Asset Library tells Blender that any Blender file in this directory can allow it’s shared Assets to be used in ANY Blender project. This will allow you to use all of the presets and Assets so that you can now drag and drop the Mannequin or any of the Fantasy Body Parts into your scene.
The name of the Directory should be automatically generated but you can give this a name if you like.

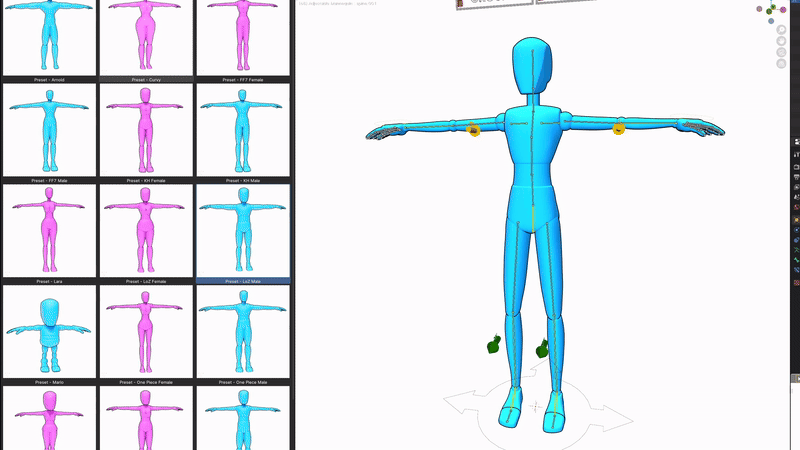
Character Presets

Along with the Pose presets, there are also a number of Character Presets to choose from. You can find these in the AM Characters Catalog.
These are all based on recognisable characters and the names tell you what they are.
I’ve also colour coded the models, so pink models are feminine models, and blue models are masculine.
Like, the Pose Presets, in Pose Mode, with nothing selected you can then double click on any of the character presets and it’ll change the rig and model.
Make sure to select a Character Preset BEFORE the Pose Presets. The Character Presets save the position of the bones in order to change the character’s proportions, so choosing a character preset after will just reset your pose.
If you select JUST the sliders, THEN select a preset, this will work fine as the sliders don’t change the position of the bones, they just change the shape keys.
Blending Character Presets
You can also Right Click on any of the presets and choose Blend Pose and this will allow you to blend between the poses, so you could have 50% Mario and 50% Peach for a character halfway between the two.
You can also select certain bones or parts of the body and then the character preset will only affect the selected areas, so you could take the slider settings from one character, or just the legs or body.
Changing Height

Blending poses is a very quick way to adjust the height of your character.
There are two presets, Short and Tall and by Blending either of these poses you can create a short or tall character very quickly
You can also select certain bones or sliders and the preset will only change those selected bones, so if you like the torso of one character and the legs of another, you can blend these together.
The Character Presets also have Tags attached to them so you can easily search for different types of Characters. You can Filter by using the Search bar at the top of the Asset Browser. The presets are broken up into Masculine and Feminine Characters and you can search for Masc or Fem to filter them.
Hand Presets
Along with full body presets, there are also a number of hand specific presets.
These allow you to change just the hands, and from here you could start manually adjusting.

Using the Hand Presets

Like the full body presets, with nothing selected, when you double click the hand pose it will apply to BOTH hands.
If you want to change just one hand, just select the hand bones by drawing a box around them with the Box Selection tool, and then the preset will only apply to the selected hand.
Easily Pose Fingers
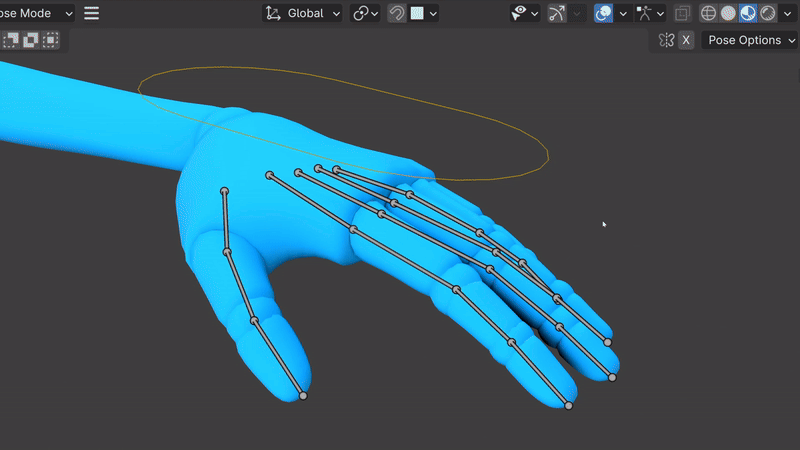
To easily pose the fingers, we can change the Transform Pivot Point to Individual Origins.
If we select a full finger i.e. the 3 finger bones (or all of them if you’d like) Press R X X and this will rotate the fingers on their Local X access, and because we're now rotating each bone along it’s individual origins, if we move our mouse, the finger will curl in naturally or bend up in a stylized pointing gesture.
This may look confusing as you’ll see lots of red lines as Blender shows each bones individual X axis, but it will bend the fingers when you move your mouse.
Custom Presets
If there are some poses that you use regularly and want to save them as a preset, the process is fairly easy, but there are a few steps to complete. I’ve made a custom workspace that opens all of the necessary windows and you can find this at the top of the screen called AM Workspace.

First of all, in the Action Editor at the bottom of the screen, click the New Button. If for some reason instead of New, it says a name, then you can click the X button and the New button will appear.
You can rename this to the name of your preset. If you want it to follow the naming scheme of the existing presets below is the formatting you need to follow.
Action - Name
Hand - Name
Lying - Name
Sitting - Name
Sitting Chair - Name

Now you can pose your character. You can spend as long as you need doing this. Take your time and make sure that the pose looks good from all angles. When the pose is finished, you can scrub to Frame 0 in the Action Editor, then select the entire rig by drawing a box around it and press I, and this will keyframe your pose.

Make sure to just select the Rig and not the sliders, as we only want the Preset to Pose the Character, not change the body shape. This way, we can apply some of the character presets and the Characters Pose will stay the same
Our Action has now been completed, but to turn it into a Preset, we need to Mark it as an Asset. Beside the name of the Action, Right Click the Shield icon and select Mark as Asset. If you’re in the AM Workspace, you’ll see the Asset Browser on the Left of the Screen update, and if you scroll you’ll find your preset.

Now all we have to do is make a nice thumbnail for the preset. Back in Object Mode, if we press 0 it will bring us to Camera View. Now we can move our Viewport window and it will move the camera. This is because of a feature called Camera to View, which you can find under the View Tab on the Right of the Viewport.
Position your character nicely and you can enable the Scene Stuff Collection and this will bring in a Ground/Background Plane.
To change the colour of the mannequin, we can go to the Material Properties, and under the Colour section you can choose one of the AM Colours, which is a Group containing all of the preset colours, so choose the colour to match the type of Preset you made.

Now we can Render our Scene (F12) and your thumbnail should look nice. The mannequin also has a Solidify modifier enabled that gives it the Black outline, and this is hidden in the viewport to make Posing more efficient.
Now we can save this image wherever you like, and when it’s saved, go back to the Asset Browser, find your preset and go to the Preview section of the Properties Window. You’ll see a File icon, select this and choose your image.

If you’d like, you can also add some custom Tags to your Presets. There a couple of Tags that I’ve used such as Weapon, Gun, Sword, Bow, Staff and if you use any of these, you can filter for certain poses using the Search bar at the top of the Asset Browser.
If you want to create poses with Weapons, there are some basic weapon objects in the Preset Objects collection and you can enable these and make your character hold them and then create your pose.
Modifying the Mannequin
If you’re happy with the changes that you made using the sliders, you may want to make some further changes to the model and we can do this in 2 ways.
If you want to keep the sliders and the ability to change your character’s proportions, simply select the Basis shape key in the Data tab and Edit your mesh as normal.
If you want to remove the shape keys and still want to be able to pose your character, we can Remove the Shape Keys and this will allow you to keep the Rig. With the Mannequin selected, we can go to the Data tab on the Right (the Green Triangle) and here you’ll see all of the Shape Keys that allow us to customise the model. On the right hand side, there is a small Arrow, press this and then choose New Shape From Mix. This will create a new Shape Key at the bottom. Now if we select the 2nd last shape key (it should be Head 2), then press the - button on the right to delete the shape key. You’ll see the model slowly going back to normal as you remove the shape keys. Keep pressing this button until you’re left with 2 keys, Basis and your new Shape Key.

The mannequin should be back to default, but if you hover over the 0.000 next to the Shape Key, we can click and drag to the right and all of our previous shape key changes will appear again. Now if we select the Basis key, press the - button twice to delete both keys and this will remove ALL of the shape keys and leave you with your custom mesh that you can play with as normal.
This mesh can now be edited as normal in Edit mode, and it can also still move with the rig. The sliders will no longer work as we’ve deleted all of the shape keys.

How to sculpt on the model
Alternatively, if you just want to use the model for a static sculpt, you can Remove the Shape Keys AND the Rig. The easiest way to do this is to select the character, then Right Click > Convert > Convert to Mesh. This will Remove all of the shape keys and Apply the Armature modifier.
The model is still parented to the Rig object, so with the Model selected, we can press Alt+P and choose Clear Parent and Keep Transformation. This will completely remove the Model from the Rig and if you like you can delete the Rig and start sculpting or modelling.

For a static sculpt, you will need to Remesh your model to turn it into one cohesive object. We can do this from the Data tab, just below the Shape Keys section.
In here you’ll see Voxel Size and this is the only one you need to worry about. To remesh simply click Voxel Remesh and this will merge all of the pieces of the model into one using the Voxel size as the resolution. If you’re losing too much detail on your character’s fingers, Undo, then turn down the Voxel size slowly, maybe halving the value each time until the fingers are still intact. From here you can start sculpting as normal.

How to sculpt but keep the Rig
If you want to have a solid model but also want to be able to use the rig and the presets, we can follow a similar process.
Select the character, then Right Click > Convert > Convert to Mesh. The main difference is that instead of posing your character and THEN remeshing, we leave the model in it’s default T Pose THEN Remesh.
Now all we have to do is Reparent the Mesh to the Rig as normal, by Shift clicking the Mesh THEN the Rig, then pressing Ctrl+P and Parent with Automatic Weights.
This may take a while depending on your Voxel Size, but when it’s finished, your model should now be reparented to the rig and you can pose and use the presets, however, The sliders won’t work anymore as we’ve removed the shape keys.
Some parts of the model may not move correctly when parented, and this will be because of the weight painting, so you’ll need to go into Weight Paint mode in the Top Left Corner and adjust the weights.

Holding Weapons/Objects
If you want your character to hold something, like a weapon or item for example, or attach things to the character, we can do this using Object Constraints .
The first step is to make sure that your object is roughly the right scale. If you’re using real world scale, that makes things easy, but if you aren’t, just roughly scale your object until it looks about right. Then Ctrl+A > Apply Scale. (Applying the scale just makes sure Blender doesn’t mess up any of the later steps)
You may be tempted to move your item into your character’s hand, we have to leave the object at the Center of the screen. The way to make sure that it’s at the center is by pressing Alt+G and this will reset the location back 0,0.
If you want your character to be able to grab the object, we need to make sure that the Origin Point of the weapon is at the point where you want your character to grab. So in Edit Mode, move your object so that the Origin Point (the Orange Dot) is on the handle/grip. The easiest way to check that it’s correct is by rotating your object in Object Mode and it should look like the weapon is being swung or used by a character.

Now we can add the Constraint to the Object. With your object selected, in the Properties tab on the Right, go to the Constraints tab and we want to add the Child Of Constraint.
You can use the Eyedropper to select the Rig. (Make sure to select the Rig, not the Object, as we want to attach the object to the Hand bone). And then under the new Bone section that appears you can search for the Bone you want to attach to, in this case hand.L
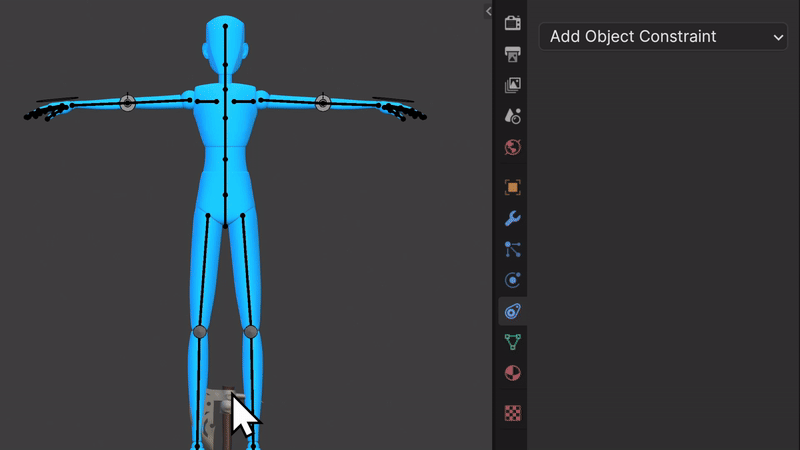
Your object should have moved near to the hand, but it might not be perfect. In some cases selecting Set Inverse or Clear Inverse can make this better. Now we all have to do is Rotate and Move our Object in Object Mode until it sits perfectly in the hand. You can scale your object as well if it seems too big/small.
Now when you move and rotate the Hand bone the object/weapon will be attached to it.

Multiple Characters
If you want to have multiple mannequins in your scene and have them interacting, you can just duplicate both the Rig and the Mesh with Shift+D.
You can then move this new mannequin to the side.
To give the new mannequin a different colour we can change the material settings. Thje easiest way to do this is just by clicking the number icon beside the Name of the Material. This will duplicate the material and make it unique.
From here, you can go to the Color property and choose one of the AM Colours on the Right. These are all of the Preset colours to allow you to keep the same colour scheme as the existing presets. Alternatively, you can choose to Remove the colour and this will give you the basic Colour property that you can adjust.

Now we can pose our new character. In Object Mode, select BOTH of the character rigs, THEN enter Pose Mode. This will allow us to use both rigs at the same time instead of toggling modes to select the other rig.
If you want to use the Preset Poses or Character Presets, be aware that the Presets will operate on the LAST selected rig. The rigs are still technically two separate objects, so we need to select one first to tell Blender what object we are working on. Then if you deselect everything, you can apply the preset. In the top left of your screen you should see the active object and bone, and when switching rigs, you’ll see this change from Adjustable Mannequin to Adjustable Mannequin.001 (unless you renamed it).

Multiple Heads/Limbs
To create more fantastical characters with multiple heads/limbs, we can duplicate the rig and mesh. (Shift+D). Then press Shift+H so we only see the new mesh.
This is almost exactly the same as the steps outlined above for creating multiple characters, however, this time instead of using the 2nd character as a full mannequin we’ll be deleting certain sections.
Your 2nd mannequin is going to be the source for the different limbs/head so you can go into Edit Mode of the Mesh and delete all of the extra parts of the body. An easy way to delete these is by hovering over them and pressing L, this will activate Linked Selection mode which will select the whole part.
If you like, you can also go into Edit Mode of the Rig and delete the extra bones, and this will leave you with just the rig for the new body parts.

Pressing ALlt+H will bring back the main model. Now if you select both the original Rig and your new Rig and enter Pose Mode, you can start posing the new body parts as well.
This Rigging setup is NOT designed for animation, this is purely for quick concept art and sculpting. In order to animate your model correctly, you would need to make a custom rig that includes all of the extra limbs/body parts that you need.

Using the Rig as Drawing Reference
If you want to use the mannequin for drawing reference, you can do this really easily.
First of all, pose your character using the rig controls or choose a preset
Enable the guide lines texture by turning up the slider, this will give us center lines for all of the different body parts
Choose your camera angle, so go to the Properties panel by pressing N, then enable Camera To View. Now if we press 0, we can move the camera and position it so that it’s centered on the character.
You can choose the aspect ratio and resolution of your image by changing the Resolution of the file, and for more varied results you can also change the Focal length of the camera, this can give you either a very zoomed or very wide angle look.
Set up your scene lighting, and now simply render your scene with F12 and save it wherever you like.
Now just import your image into whatever software you use, so Photoshop, Krita, Procreate, Clip Studio Paint and start drawing! You can use it purely as reference, or use it as a basis and trace over it, adding your own details.


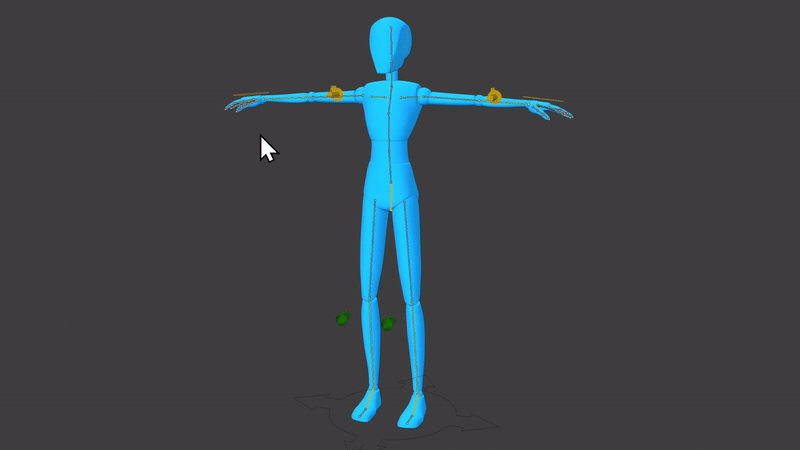
We’re using Blender do don’t be afraid to mess with the model. You’ll see in my example of Bulma from Dragon Ball Z, I’ve actually just downloaded a model of Bulma and stole the head from it and replaced the default mannequin head. I also adjusted the mesh slightly, giving her some shoulder pads and added a very basic skirt shape.
So pick out the major features for your character design, maybe they have horns or specific clothing or accessories and model them using primitive shapes.
Then with these features in place you can use it as a basis for drawing. It’ll still take some work to get it to look like a finished piece, but it definitely helps, and it can be a great learning tool as well, to teach you how different parts of the model are affected by light and shadow and how perspective affects your character.


Exaggerating the model
If you want to exaggerate the model you can do so in Edit Mode or you can use the Shape Key settings to double the effect of the sliders.
Choose a character preset or move the sliders and when you’re happy, go to the Shape Key settings and click the Arrow on the right and select New Shape From Mix. This will create a new shape key that contains all of the shape key changes, so turning this up will double the effect of the shape keys. And you can easily do this multiple times if you want to create very exagerrated characters.
The exaggeration may not look 100% accurate because it’s pushing the model past it’s limits, but you can easily adjust it to your liking.

Outline
When you render your scene you’ll see a Black Outline around the character and this is created with the Solidify modifier.
If you don’t want the black outline you can simply delete the Solidify modifier.
The Solidify modifier is hidden in the Viewport as when posing it slows down slightly because we’re basically posing two versions of the model and Blender is having to generate the outline every time we move the mannequin. You can enable it if you want to change the outline, but hide it when posing your character to improve performance.

You can change the Thickness of the outline in the Solidify settings by changing the Thickness.

If you want to change the colour, you can go to the Material properties and you’ll see a Material called Cycles Outline. From here you can change the colour.
Normal Backface Culling materials don’t work in Cycles, so this has a little bit of Shader magic to allow us to create the same effect in Cycles.

Rigify
If you’re a little bit more advanced, you can make use of the Rigify Rig to pose or animate the mannequin. As well as having the Sliders to control your character’s body proportions you’ll have access to all of the Rigify features.
If you want to use the Rig and the sliders at the same time, you can select both of them and THEN enter Pose Mode. The two Rigs are technically separate objects so Blender needs both of them to be selected. With the menu selected you can utilise some of the character presets that you can find in the Asset Browser and this will change the sliders for you.
When you first open the Blender file, you may encounter this warning. Rigify is a built in Blender addon and it runs a Python script to set things up, and this is what Blender is warning you about. For now, you can click Allow Execution, but every time you open the file it will give you the warning so you can click Permanently allow execution of scripts.

I won’t explain everything about Rigify because there’s a lot to it, but I’ll walk through the basics.
One of the main benefits of Rigify is that it gives you easy access to Bone Layers while using the Rig. So in the properties panel, you can see the Rigify menu and all of the Layers. You can enable all of these and your rig will become quite messy because you’re seeing every single control, however, you can just choose the ones you want to work on and that’s all you’ll see. It’s very convenient for making more advances poses/animations as you can get into really fine details but when you’re finished, you can hide those details and make the bigger motions.
Like the regular mannequin Rig, you can select any of these bones/controls and move/scale or rotate them to make your poses.
If you like, you can go and watch some dedicated Rigify tutorials because there’s a lot to it, and you can make custom rigs with any kind of controls that you want.
Troubleshooting/FAQ
I can’t open the file, Blender keeps crashing
The Adjustable Mannequin is only compatible with the newest version of Blender (or some older versions, check the compatibility section). If you open it in an older version of Blender, Blender will crash.
So if you double click the Adjustable Mannequin file and Blender immediately crashes, it’s because you are using an incompatible version of Blender.
I can’t use the presets
The Presets were created using Blender’s Asset Library, and this needs to be enabled in the Preferences, you can find the explanation here. In the future this may be enabled by default, but for now you have to enable it in the Preferences.
Can I use this character for a game/animation/VTuber/commercial use?
Yes you can, if you’ve changed it enough. You can’t just take the default mannequin and use it as the main character for your game, although, if you use the mannequin as the basis and give it hair, clothing, armour etc, then that’s fine. As long as it’s not IMMEDIATELY recognisable as the Adjustable Mannequin, then you can use it.
I can’t move the mannequin or the sliders
The Adjustable Mannequin uses a Rig to pose the character and move the sliders. A Rig is a special type of object in Blender that allows us to animate and move bones. Make sure you enter Pose Mode in the top left corner of the screen, as explained here.